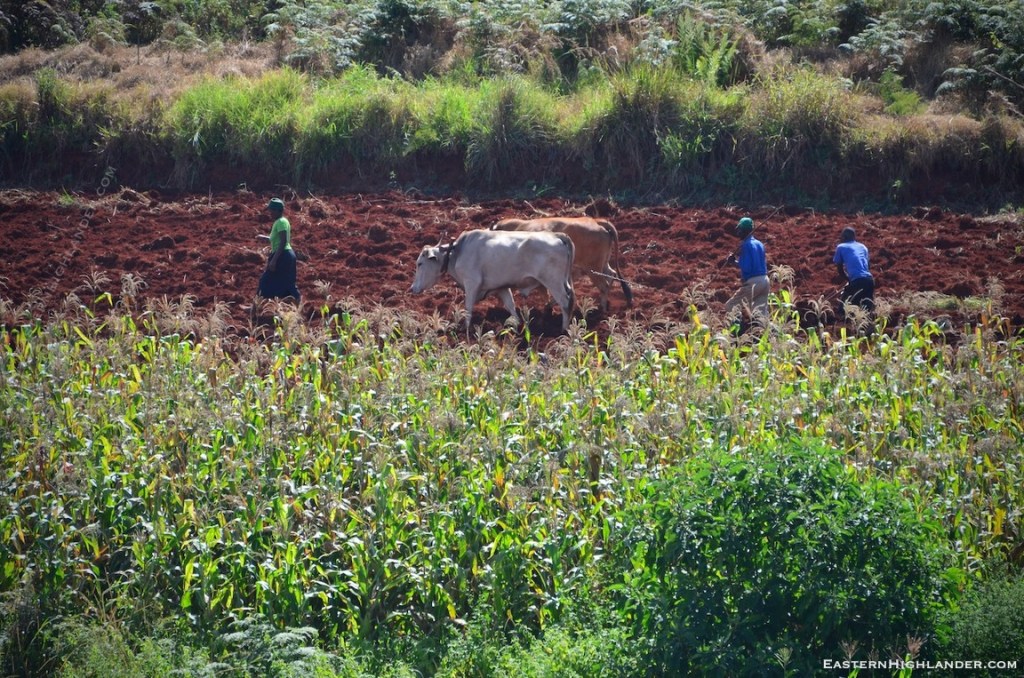
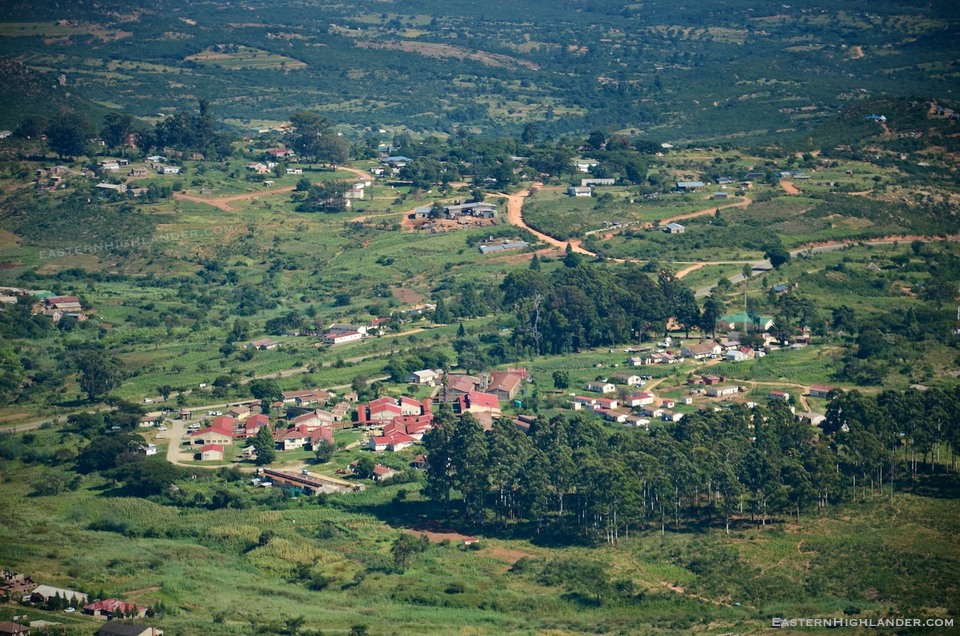
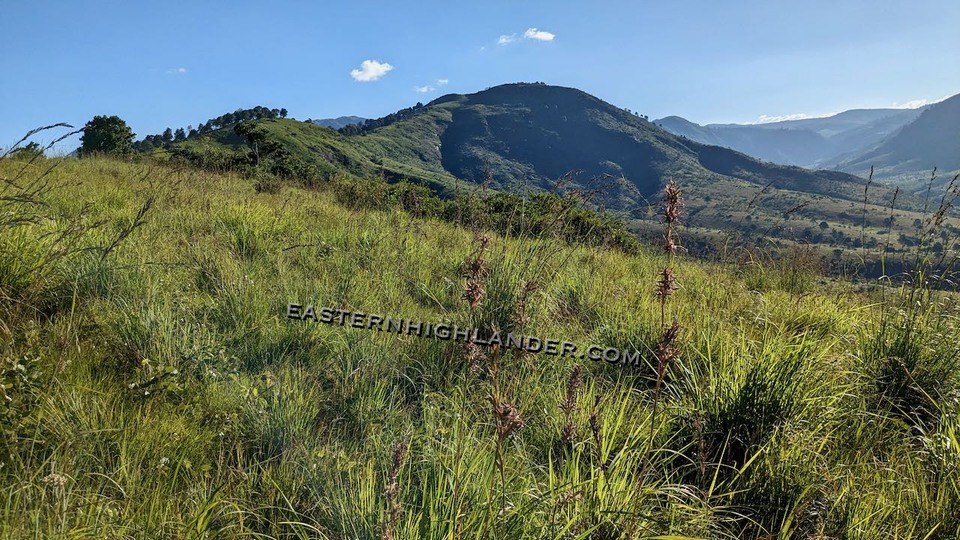
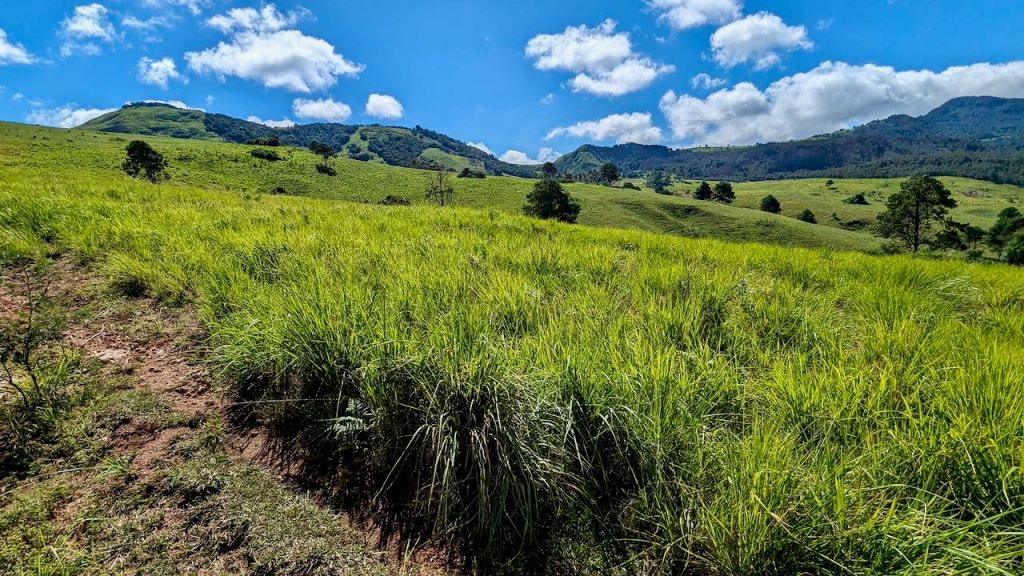
Parked at Mai Joy Matema’s cabbage emporium on the tar below Matema and headed north on the rough dirt road through the terraced fields (makondiwa – but this is a very local word I think). It looks green here because of its location, on the side of a hill, with some irrigation, but the crops are not as they should be even in this – an assuredly wet area of Zim.
Contour fields- Makondiwa
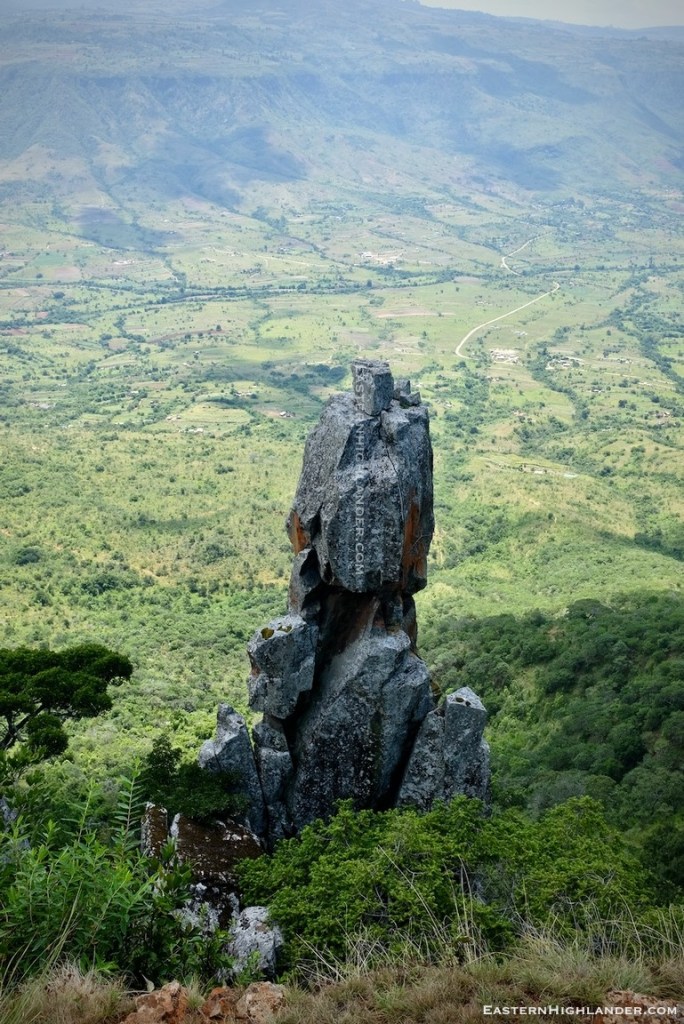
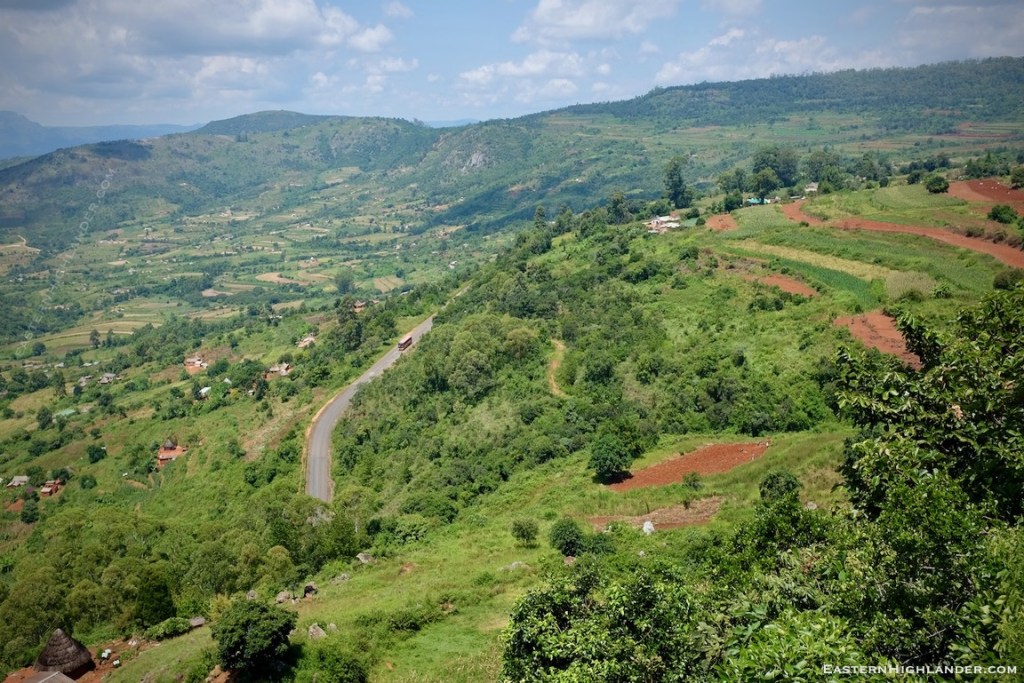
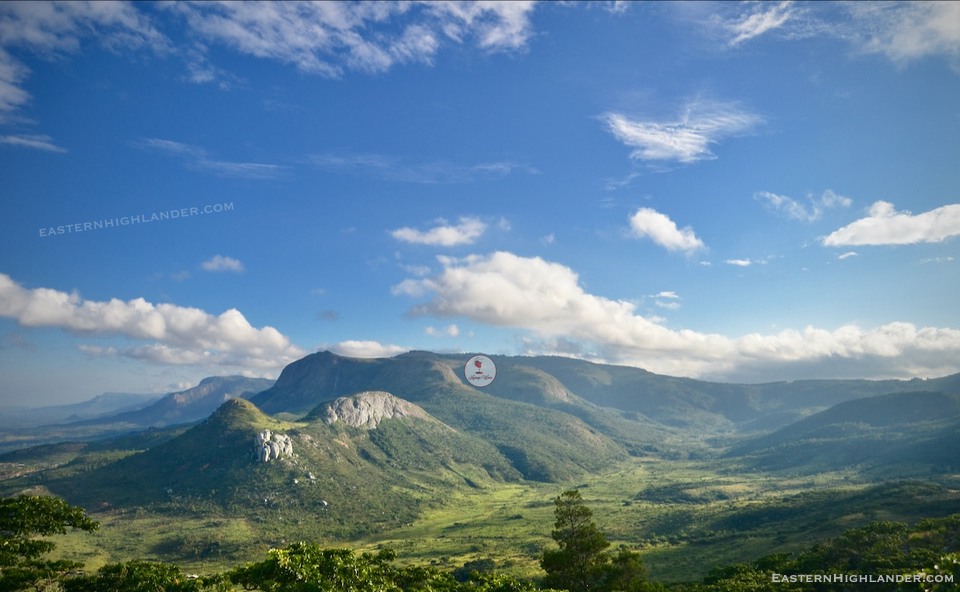
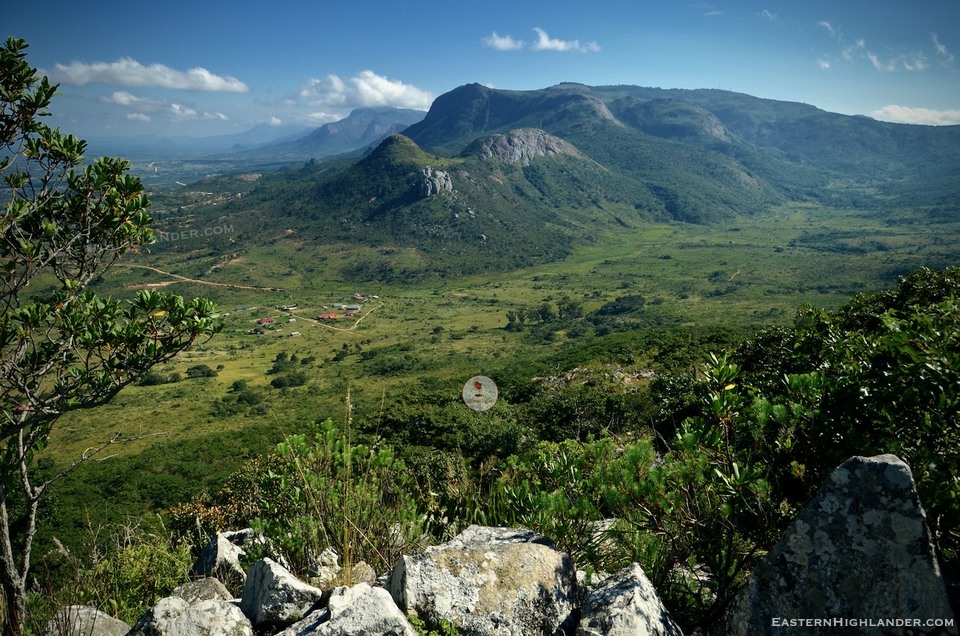
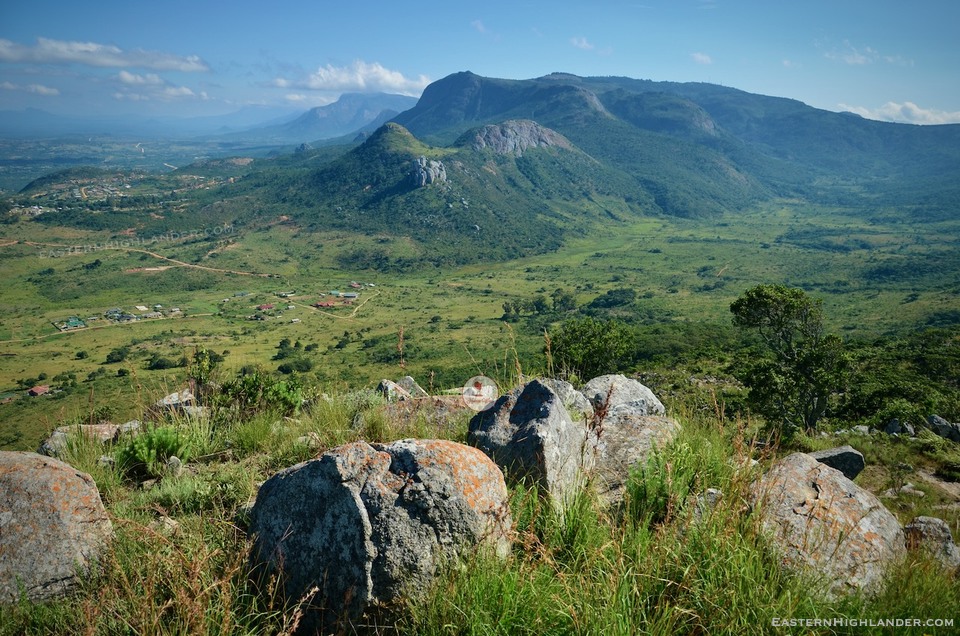
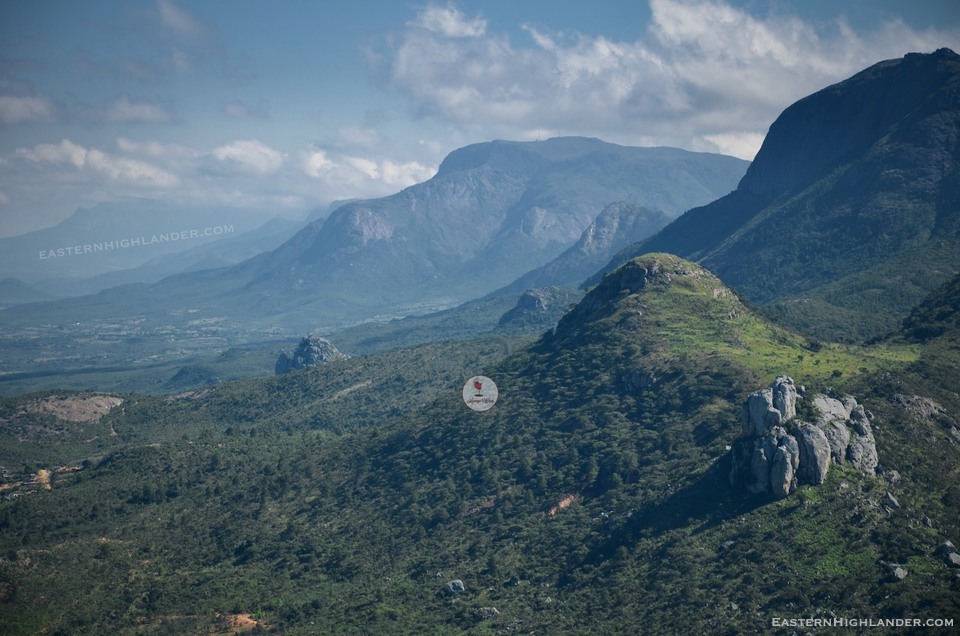
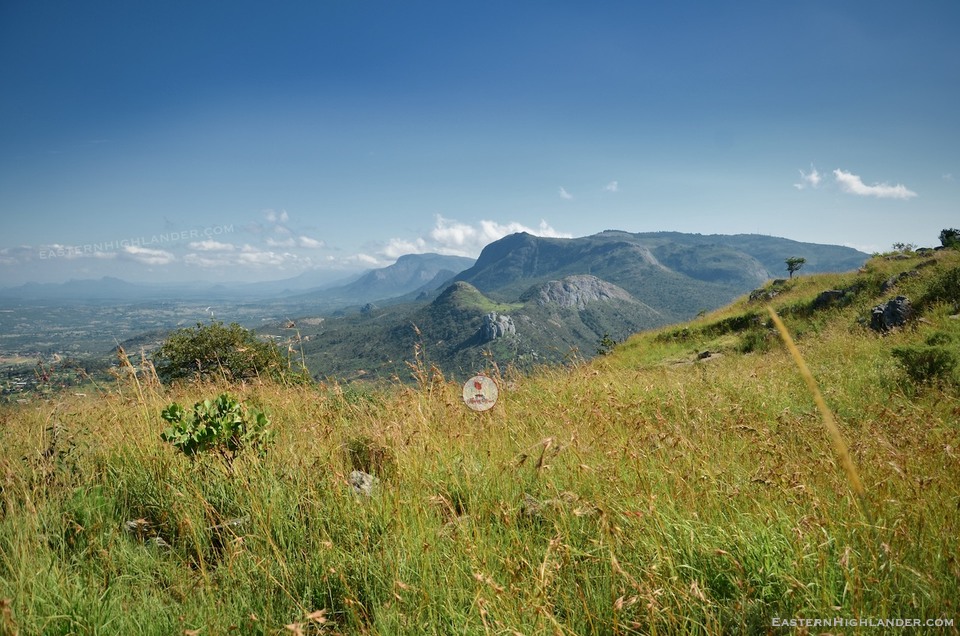
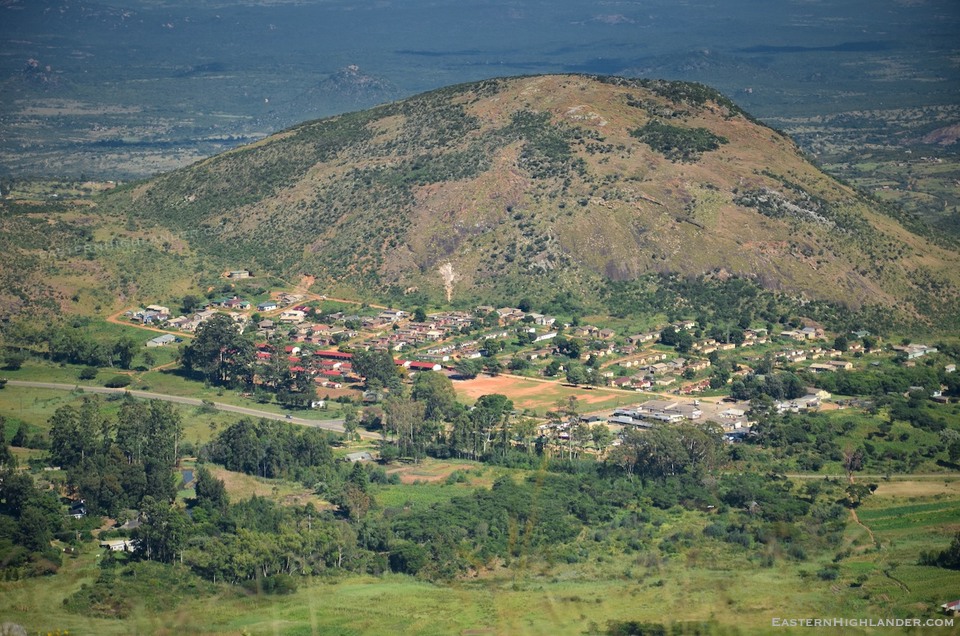
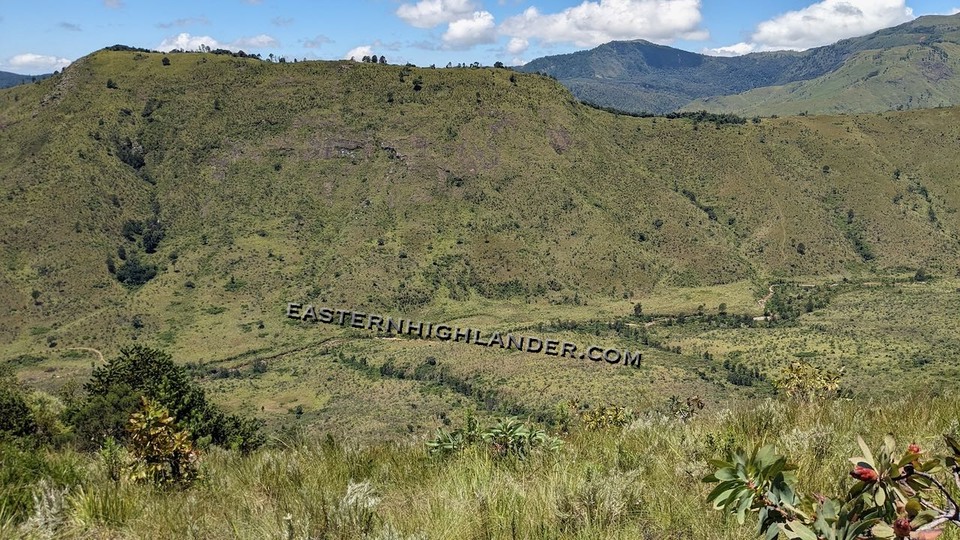
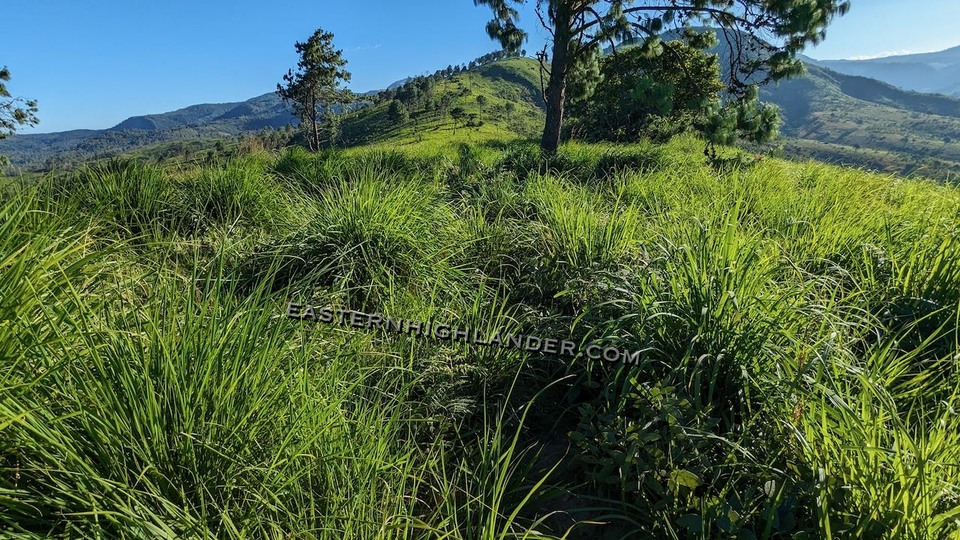
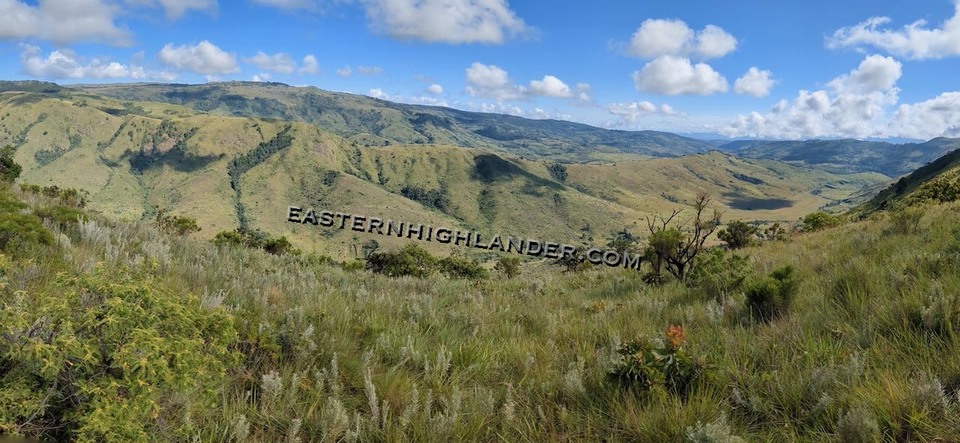
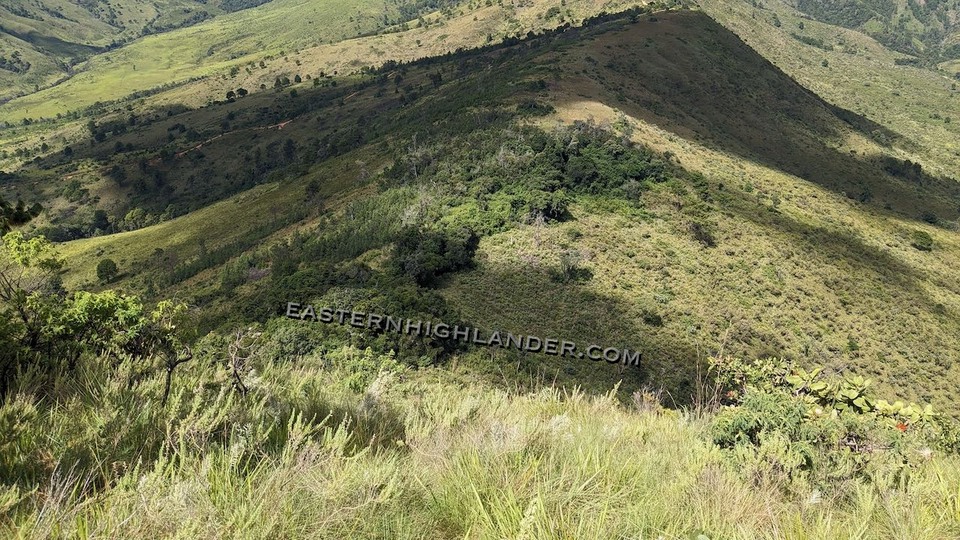
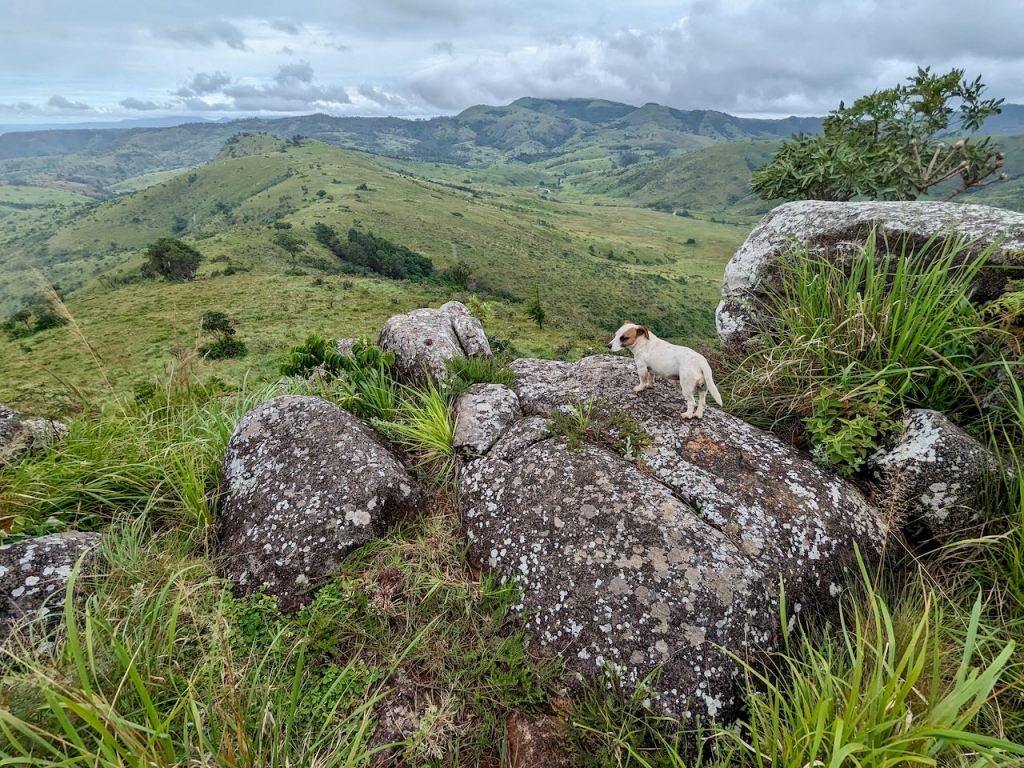
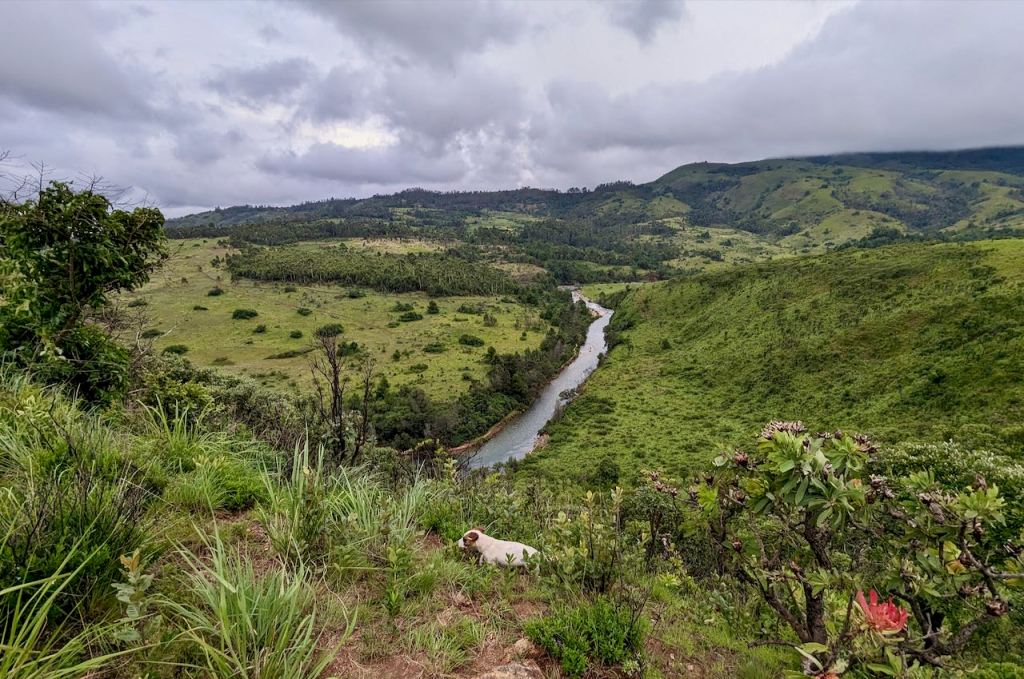
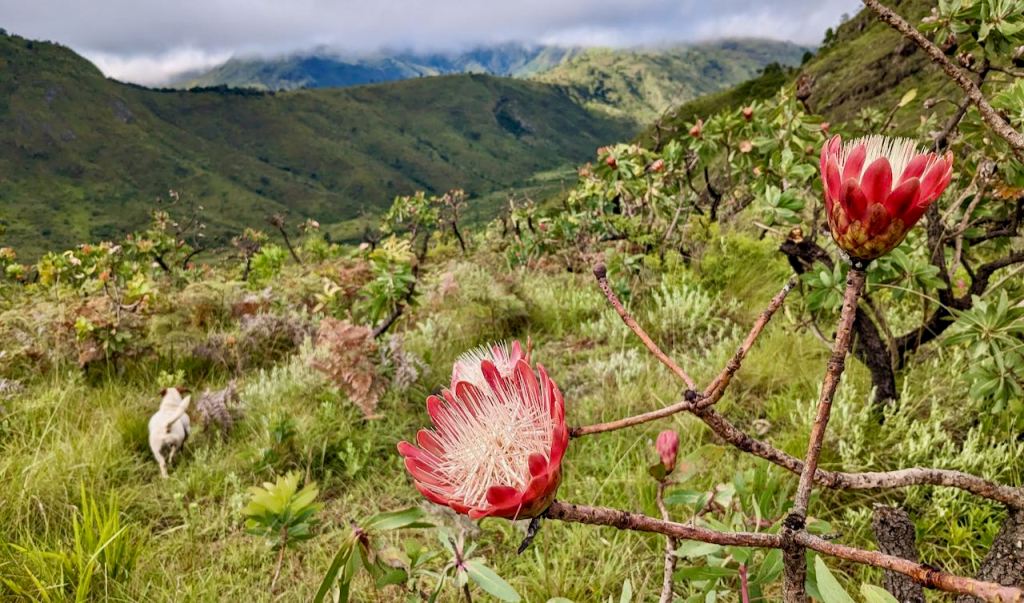
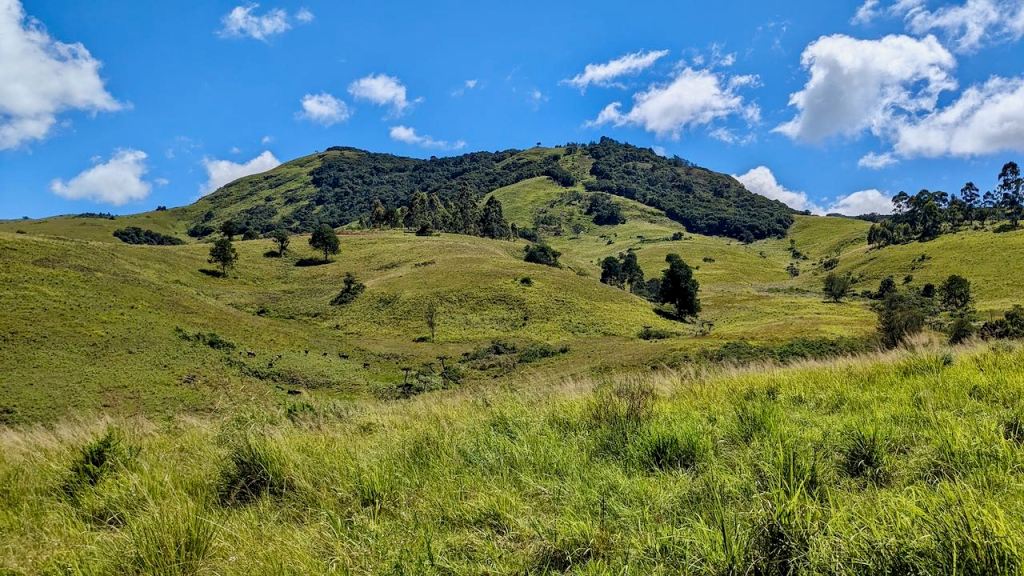
I knew roughly where I wanted to go so took some advice as to paths coming off the track and wound my way to the Maarira homestead from where I was guided by Mai Maarira herself to this spectacular viewpoint 1.3km further on, right at the edge of the high ground.
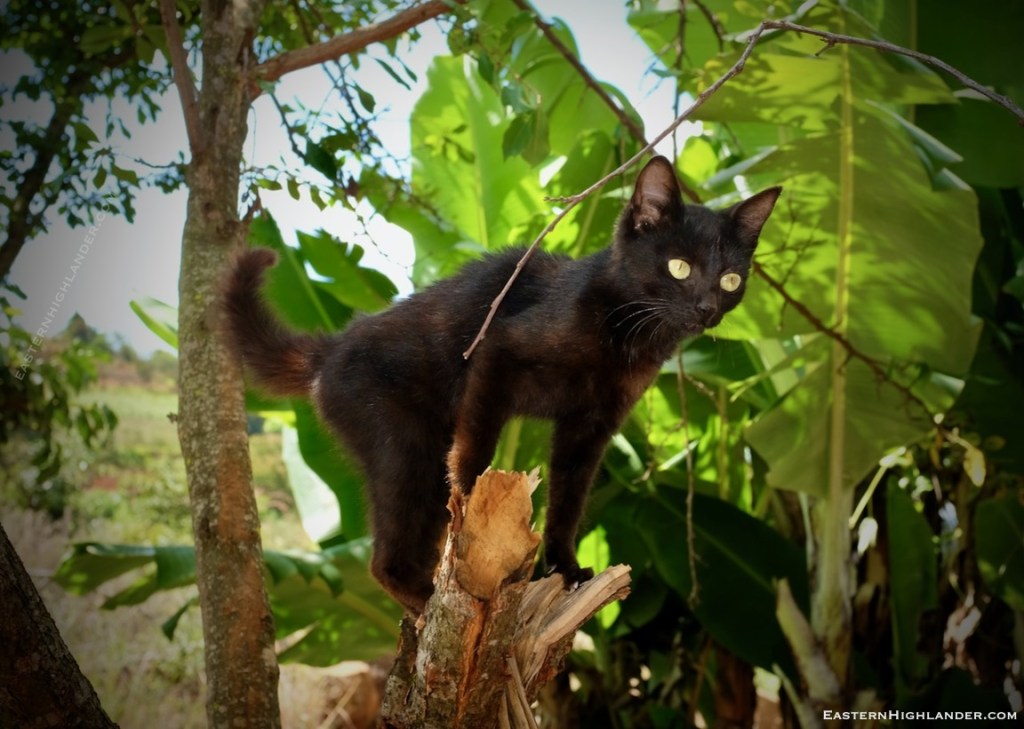
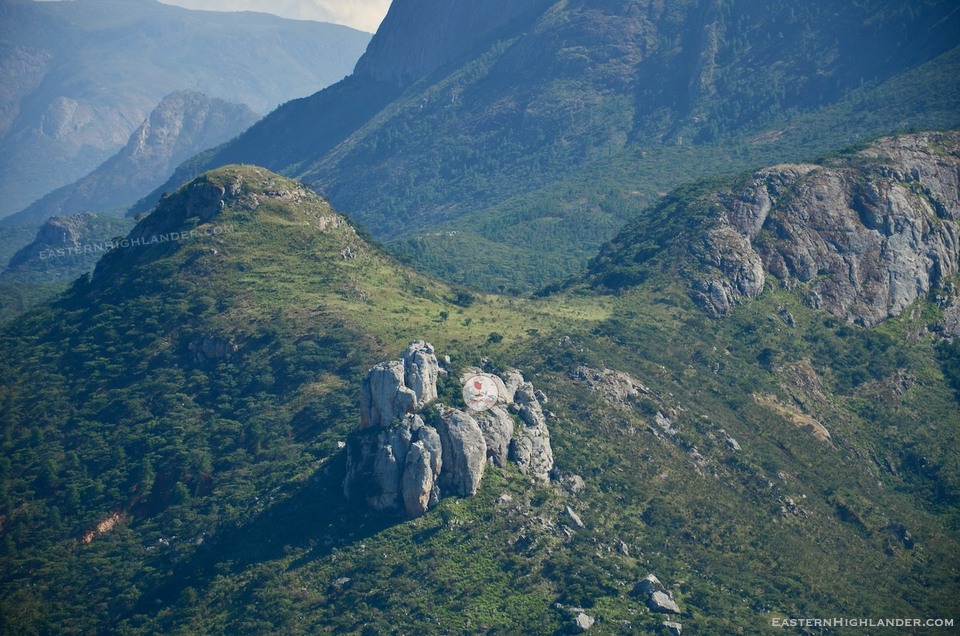
Monet right at the edgeMonet leaves the edge!Road below Matema on the way to Tombo 1Above the site of the 1991 bus accidentFelis Catus about to leapI can see a couple of characters there alright!
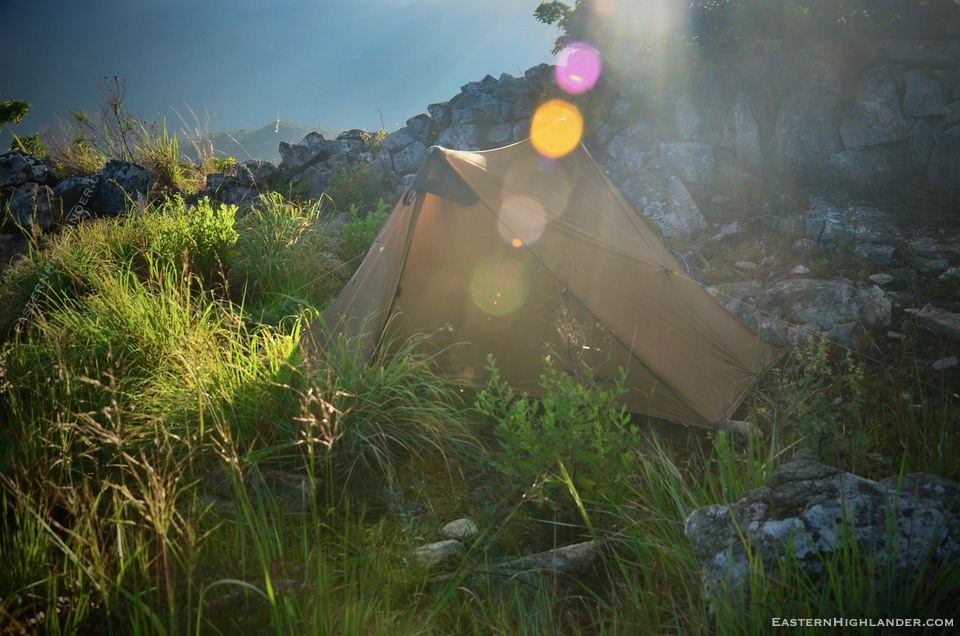
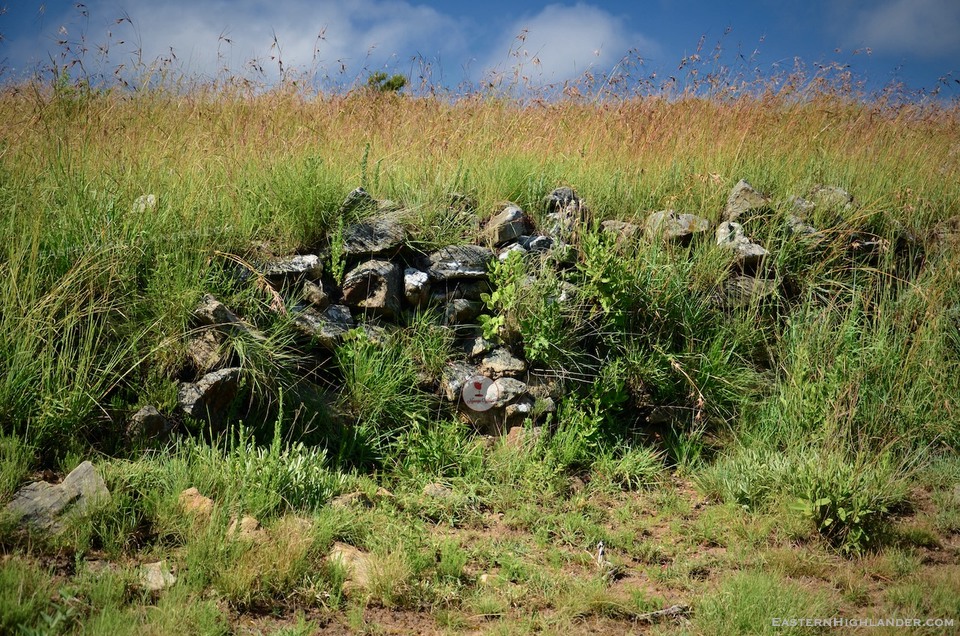
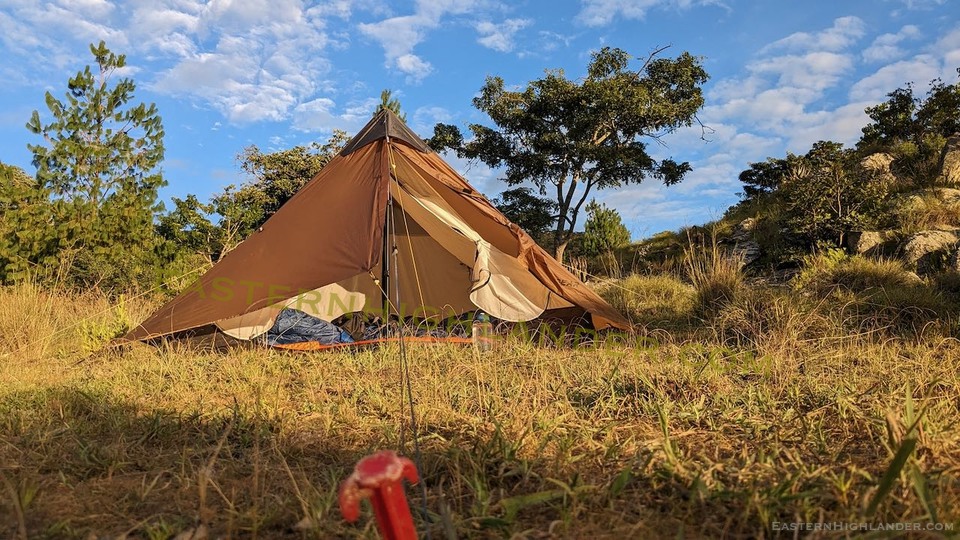
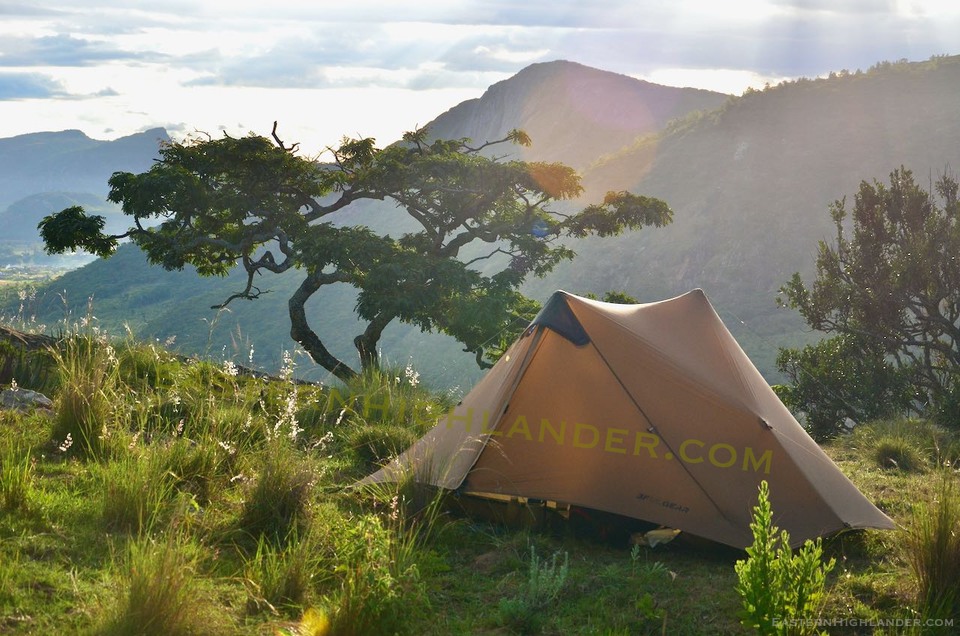
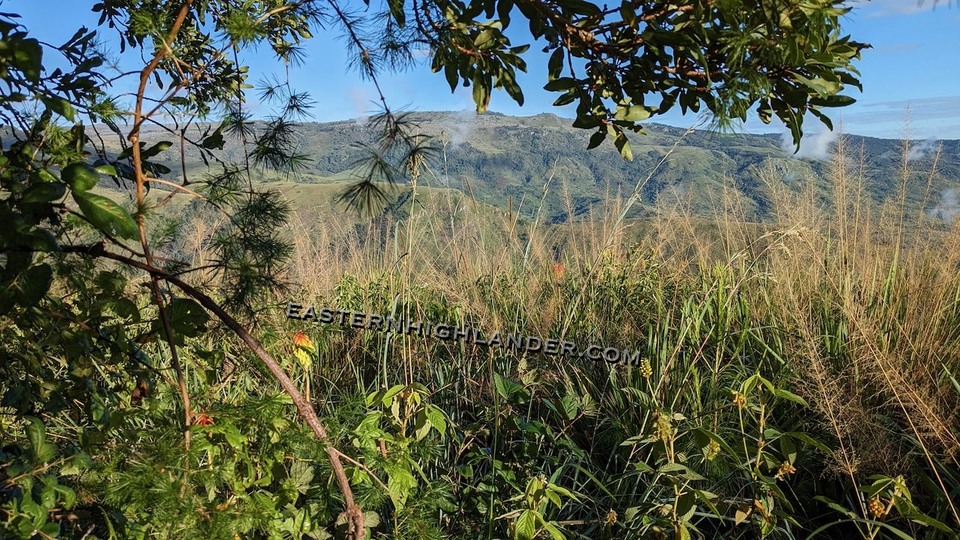
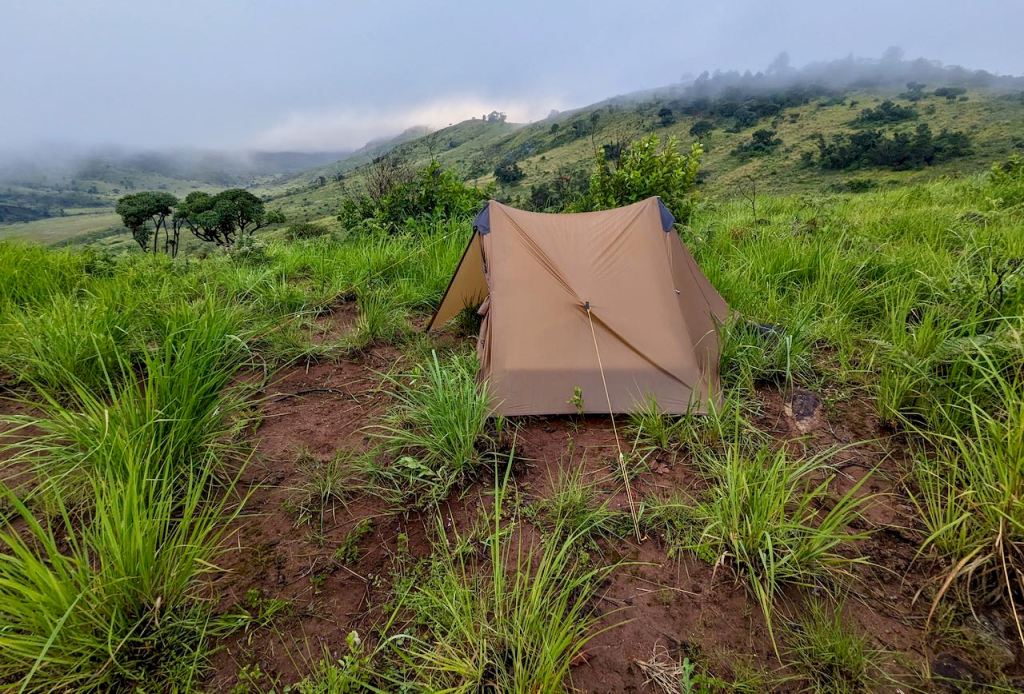
9 – 10 March 2024. An overnighter close to the top of Demera (Bepe Peak) mountain in Nyanga.
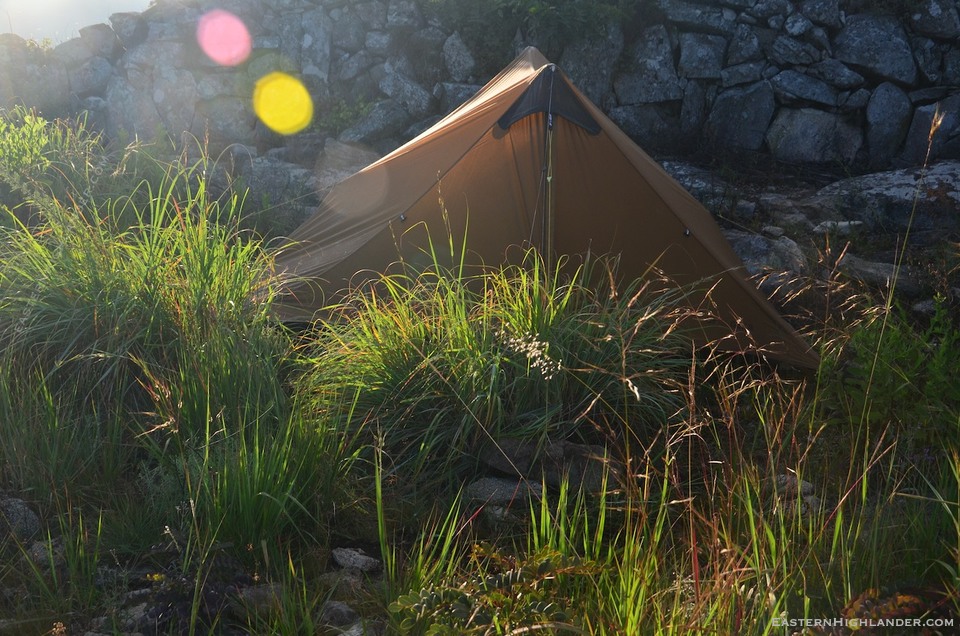
I eked out a pitch here as there was some wind shelter behind this ancient Shona wall, and the rain was approaching from Nyangani. There are a great many Shona remains on top and a round Kuwira on the way up.
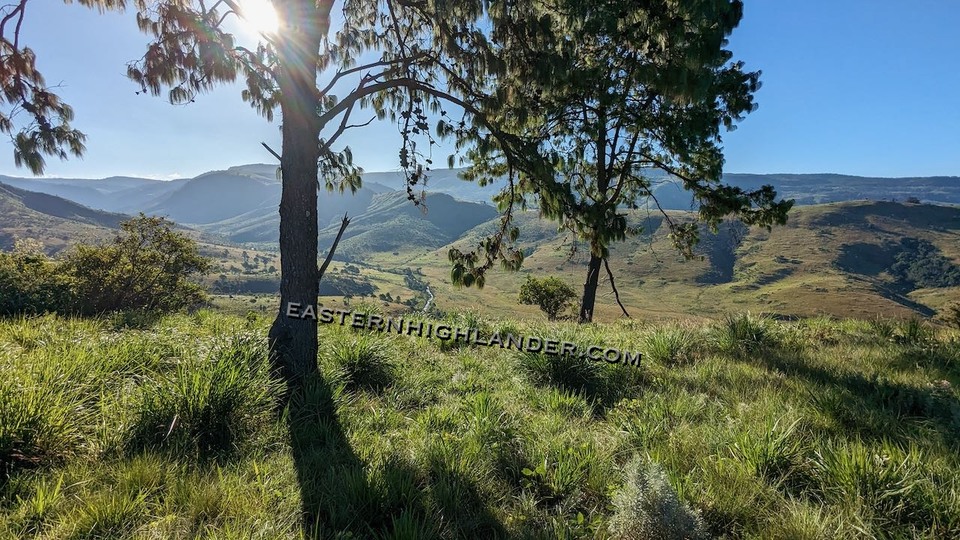
The views the next morning were well worth it though!
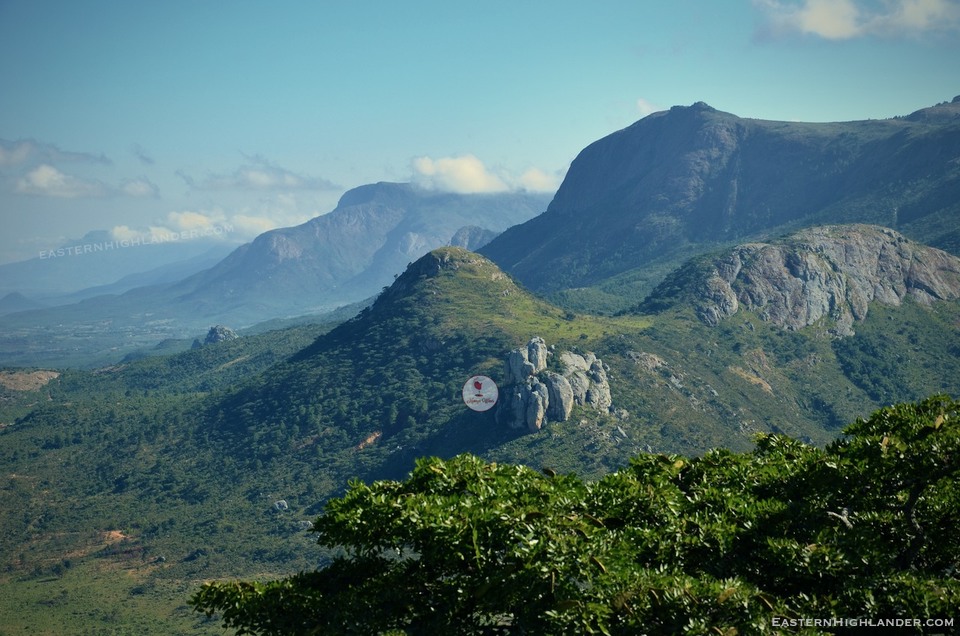
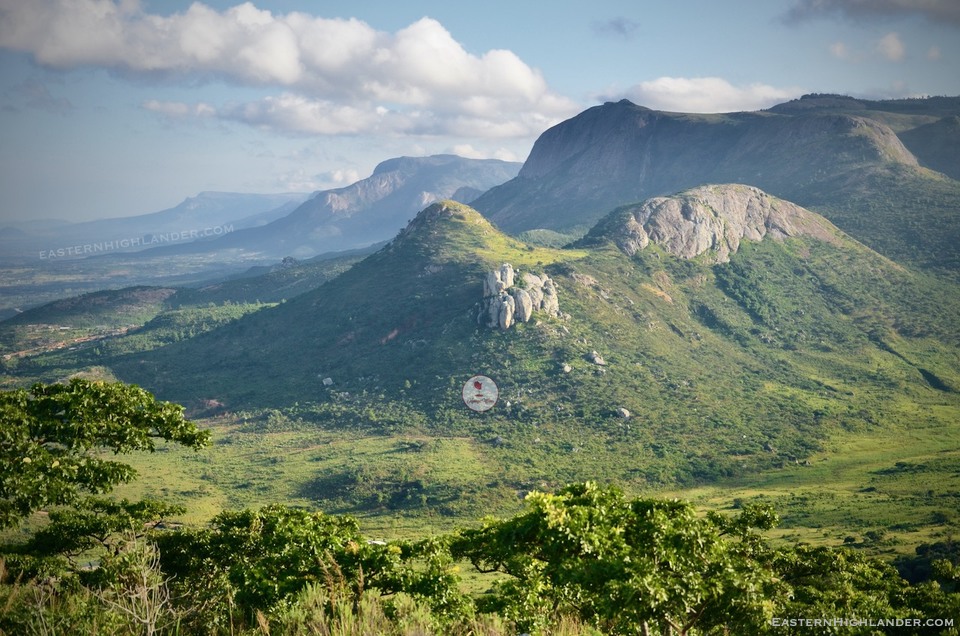
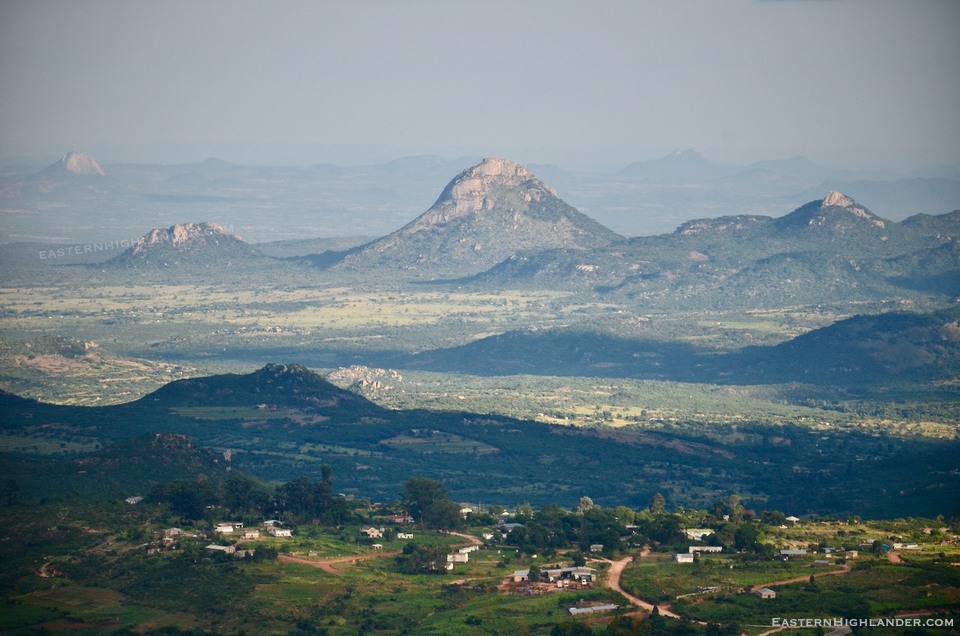
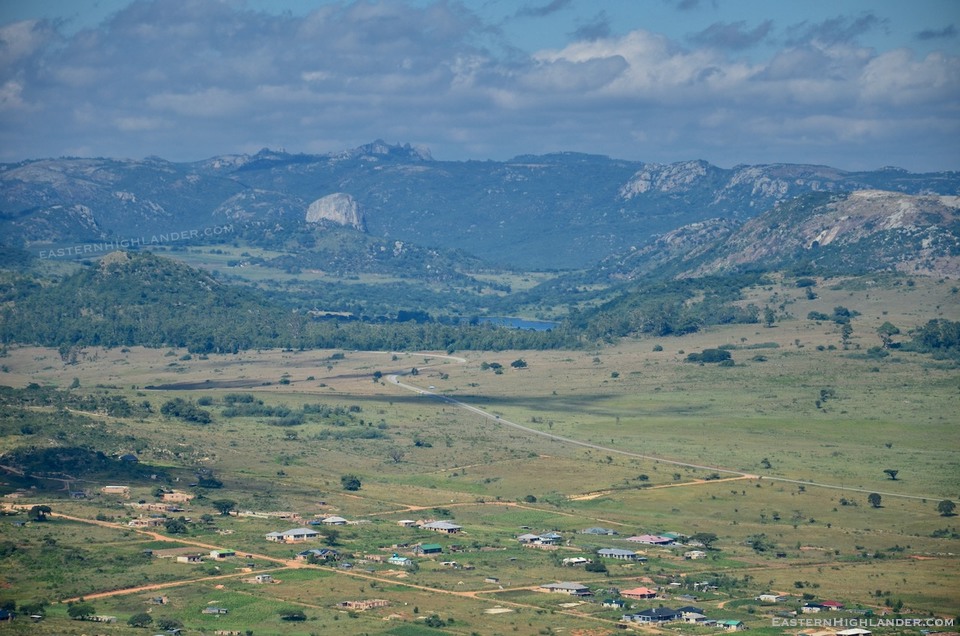
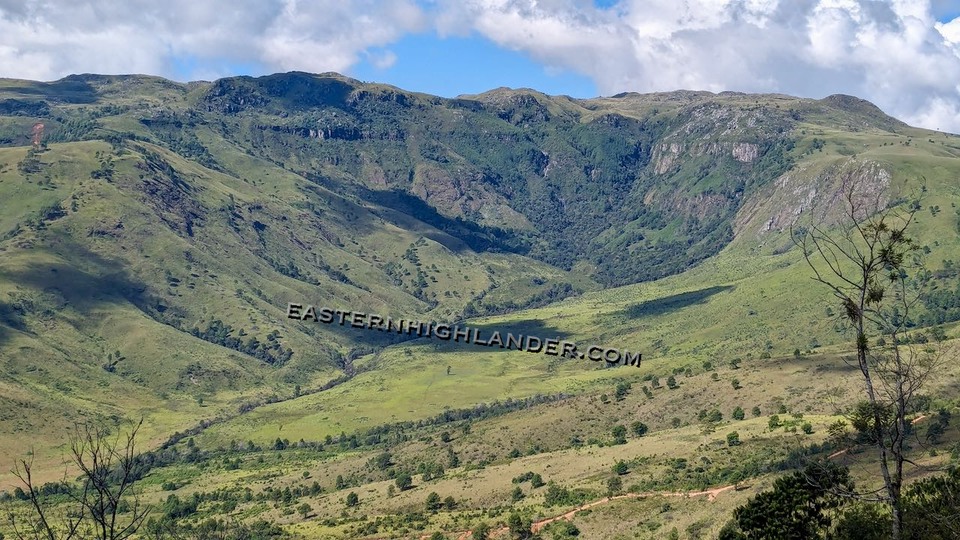
Great views of the Nyanga escarpment 500 to 800m up!
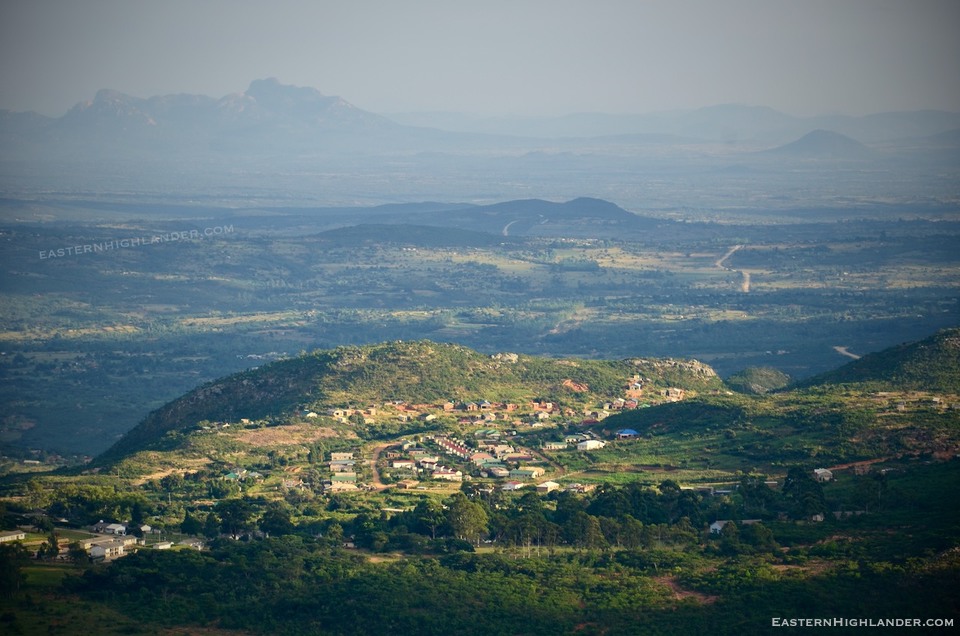
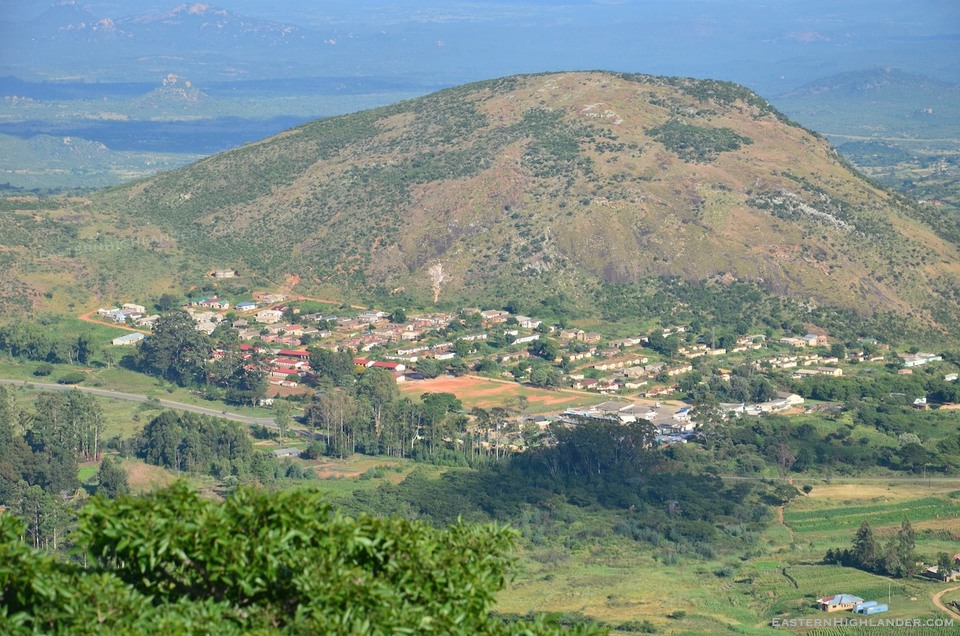
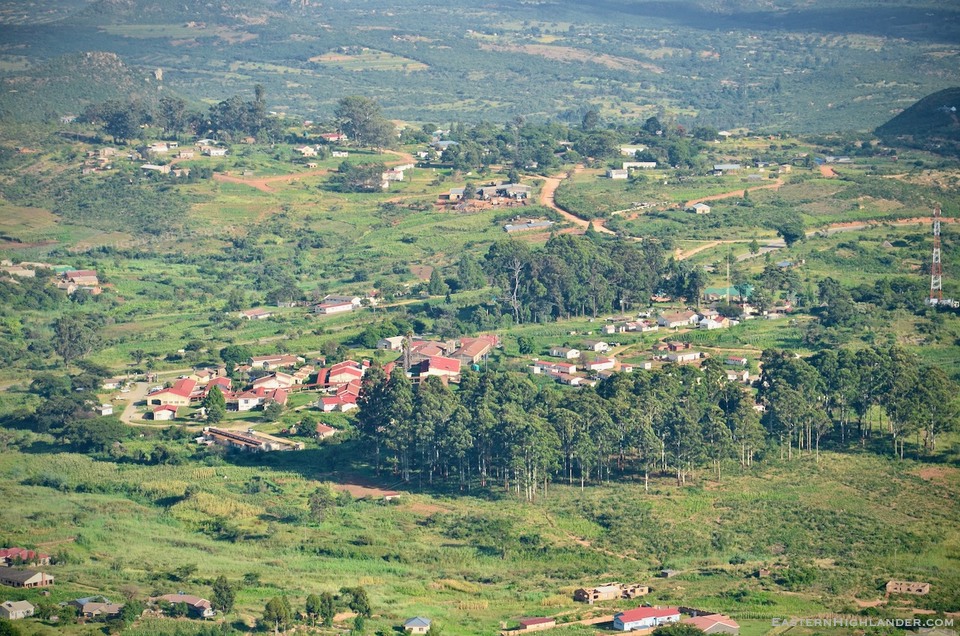
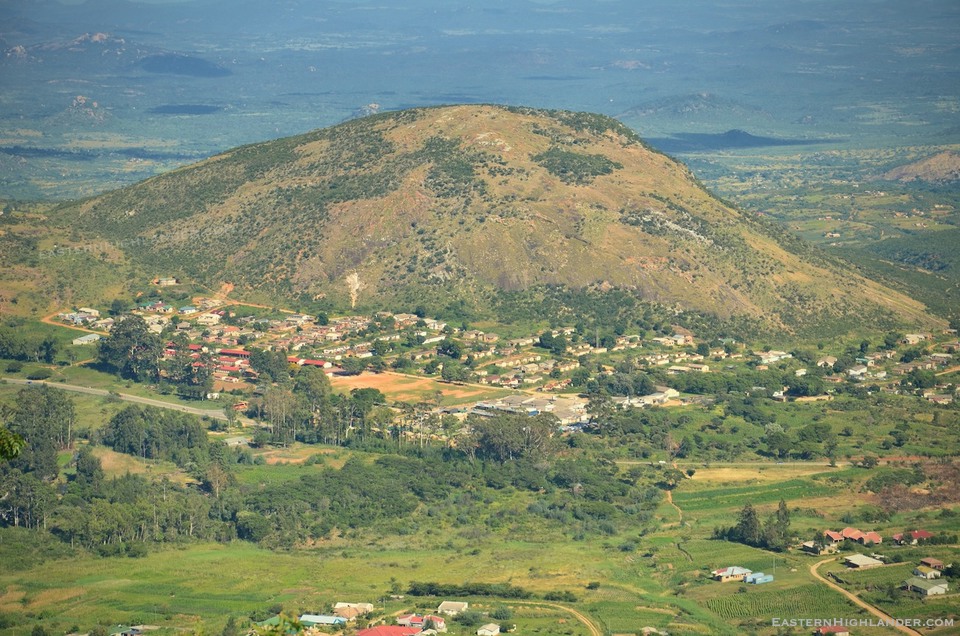
And good views down to Nyanga town – though you have to really be ‘into’ Nyanga for these pics!
On Thursday in Sakubva market in Mutare I picked up a Gregory Stout 65 litre rucksack for $30. In very good condition apart from the front stretchy pocket which has a repair patch sewn through to the main compartment underneath rendering it unusable. Still, hundreds or thousands of km and dollars away from an outdoor shop selling US equipment, it was a remarkable find! And, of course, it needed a test drive to compare it with my, now almost new, Lundhags Padje Light 45 litre.
New rucksack under a tree!
So, a 20km jaunt to our favourite waterfall and back.
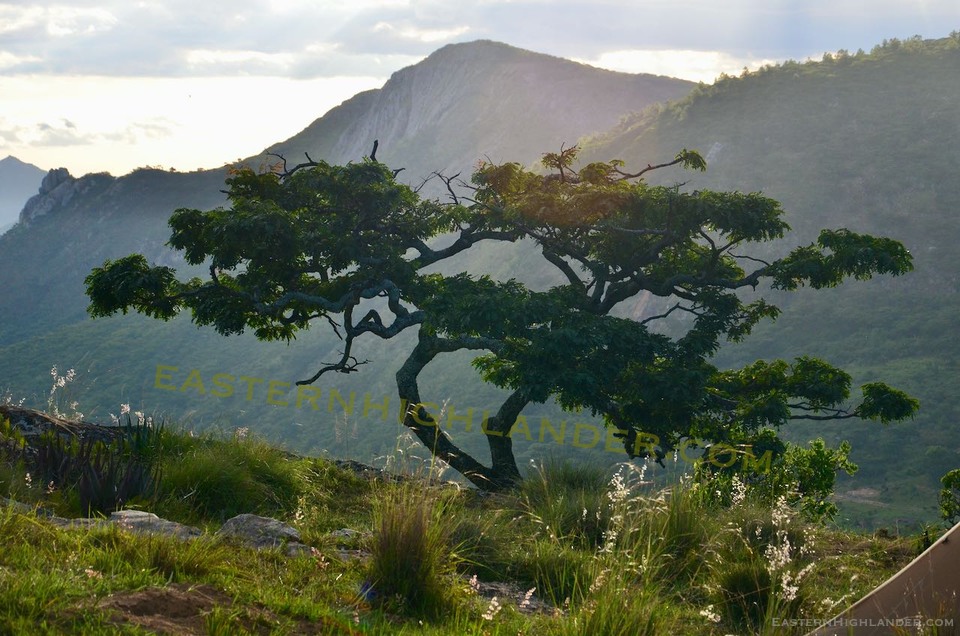
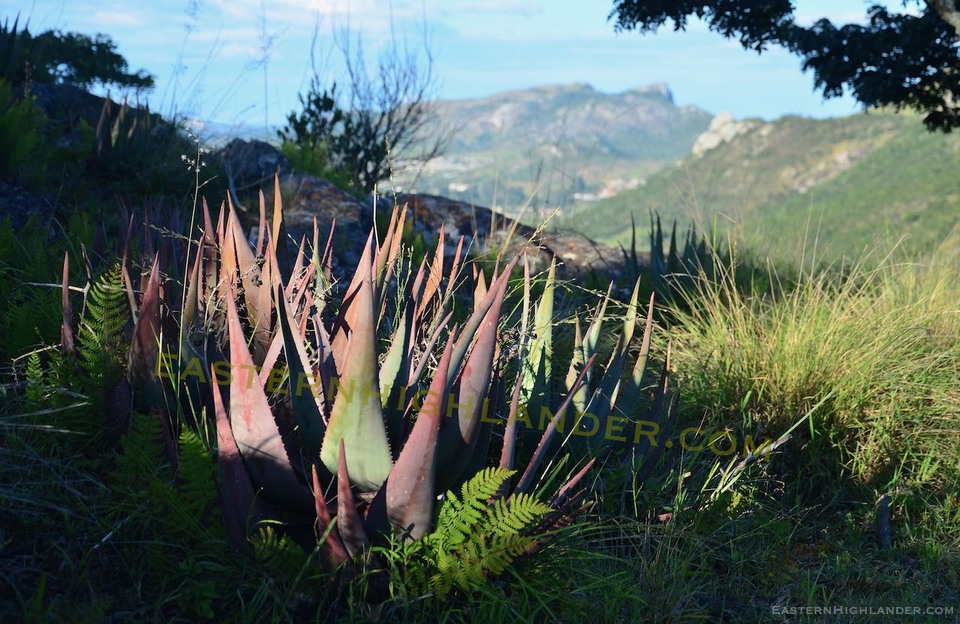
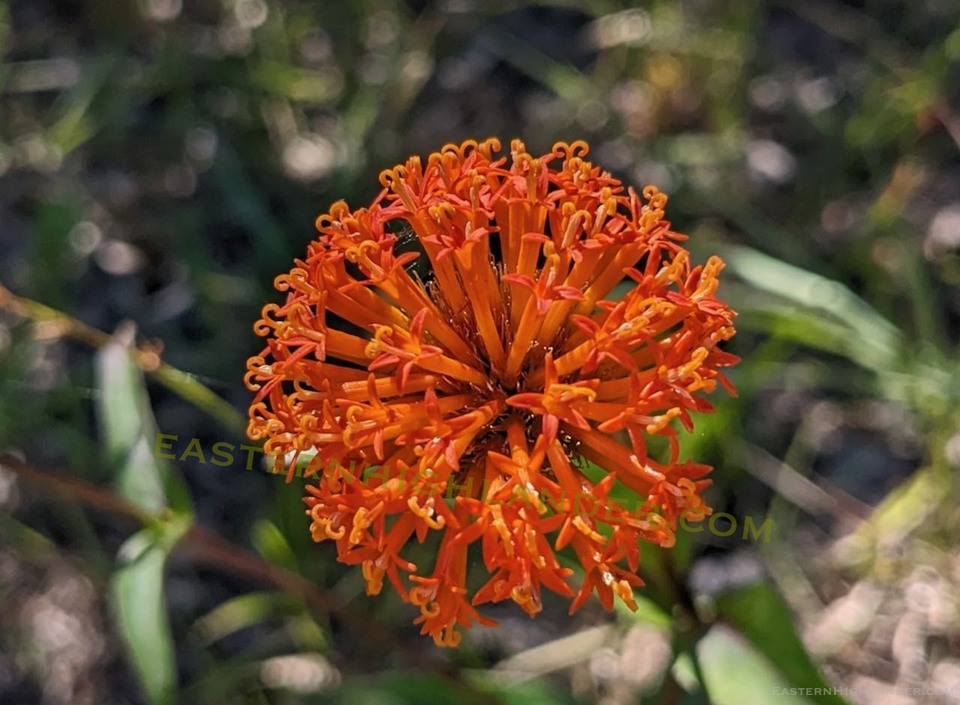
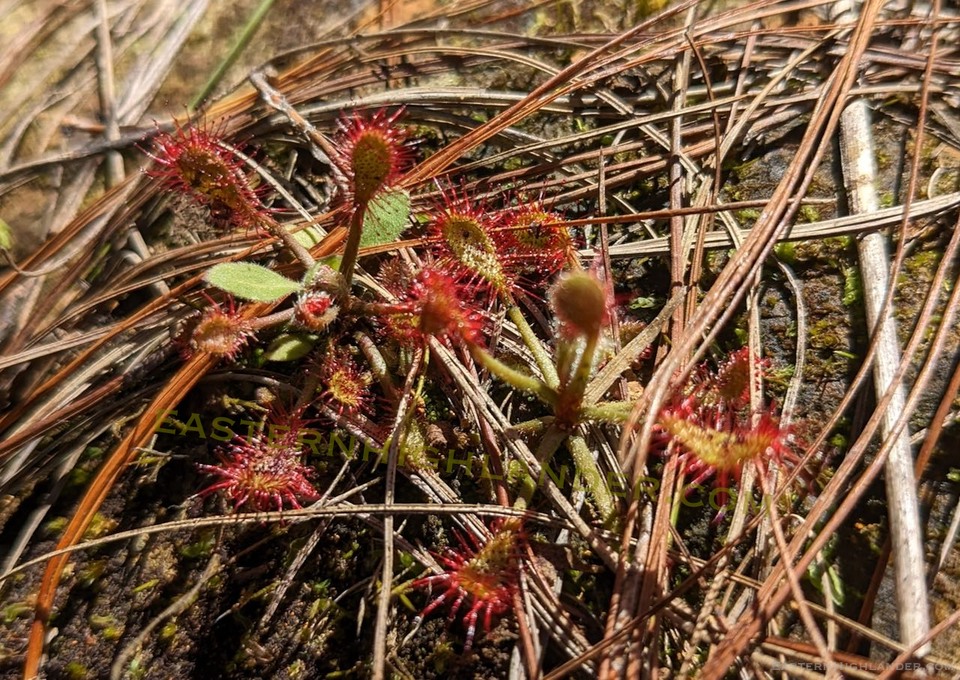
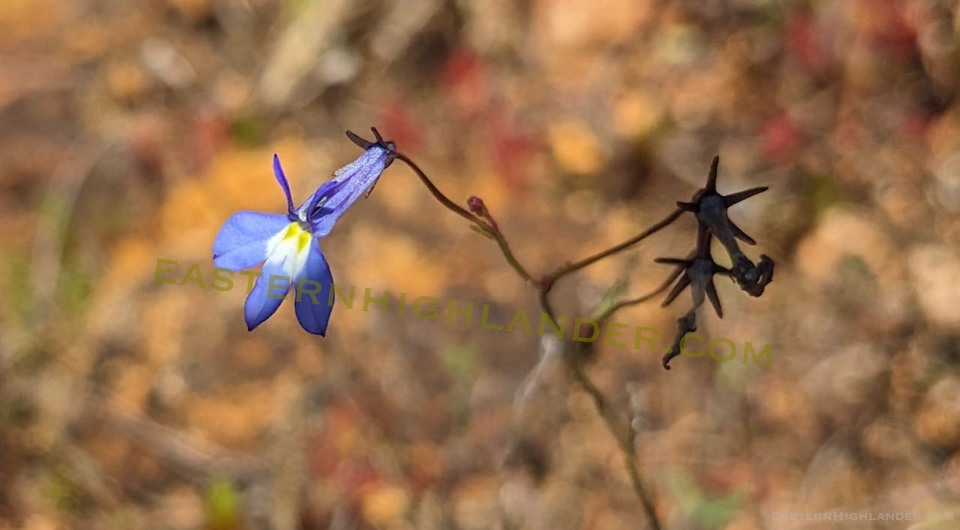
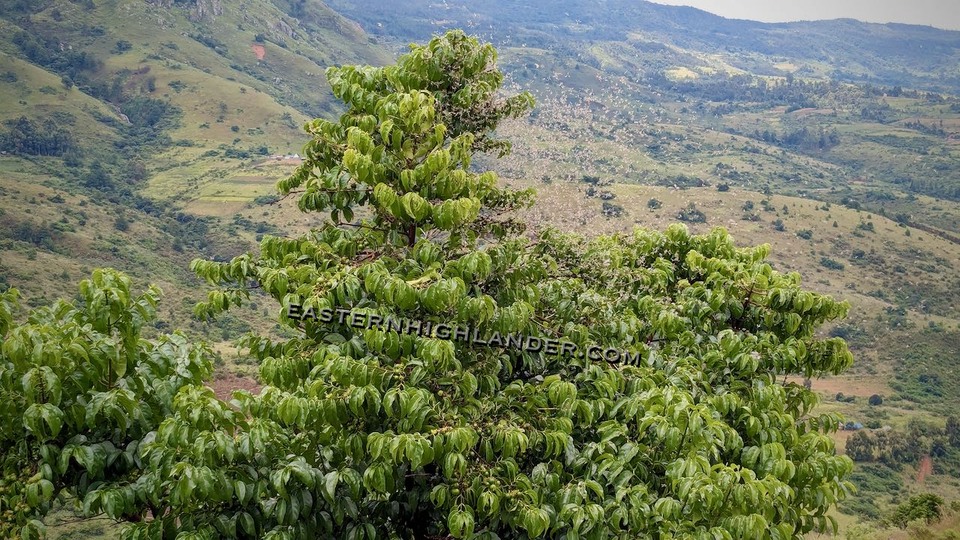
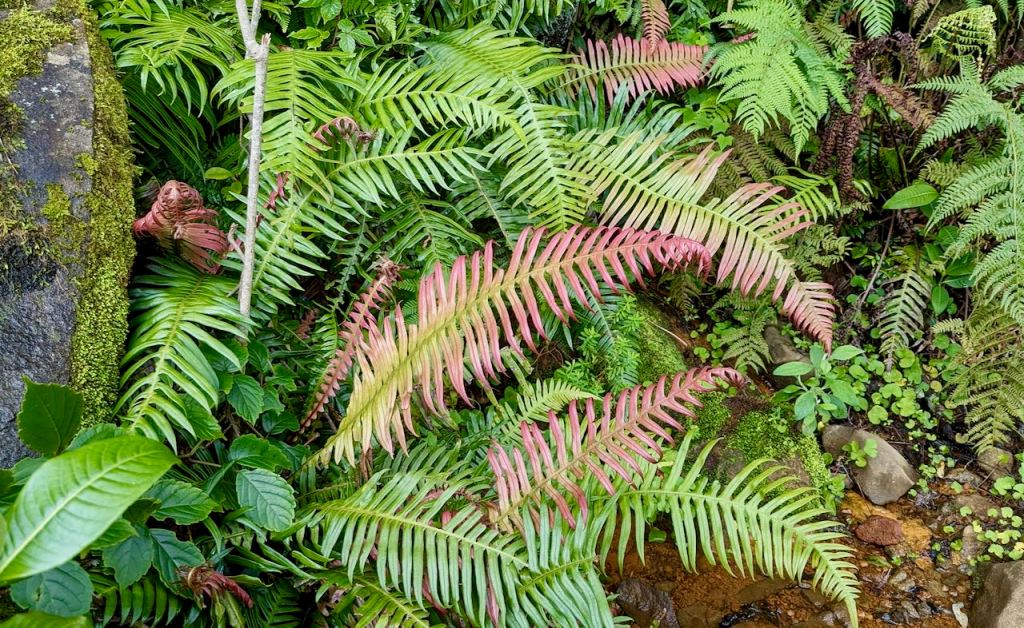
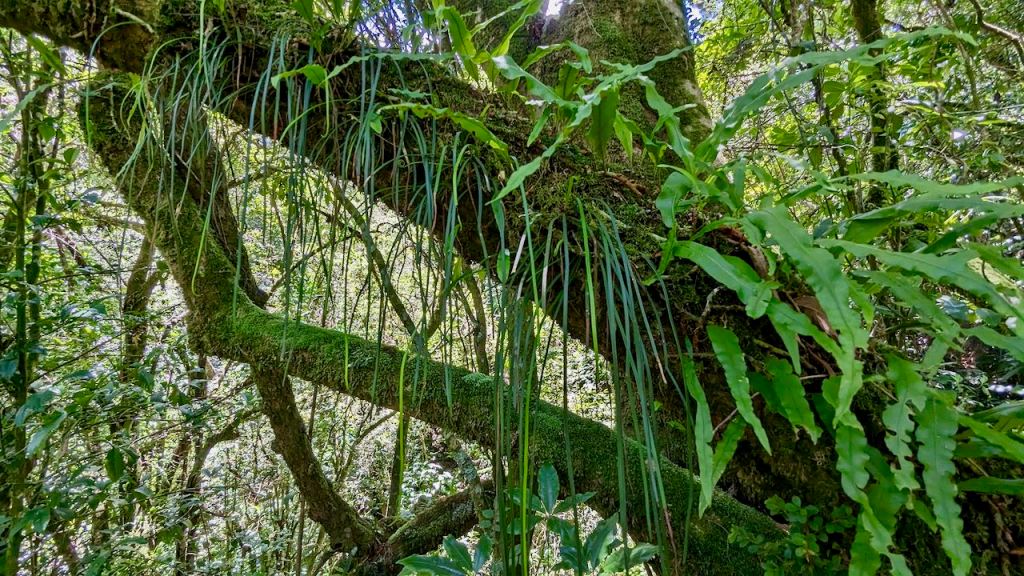
The Lanshan 2The Lanshan 2 sights Nyanga for the first time.That picturesque treeNyanga is below in the distanceSome kind of single leaf upright fern jobsThe app didn’t knowThe app didn’t know. Looking on line it could be Kleinia fulgensAmaryllis This one I know – SundewFrom the edge of the camp site down to Nyanga. Nyarerwe river valley.
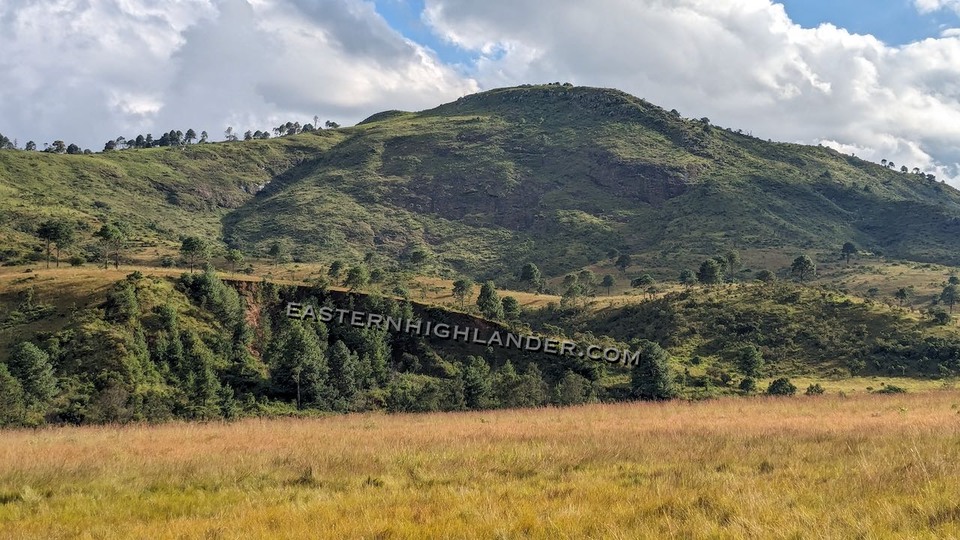
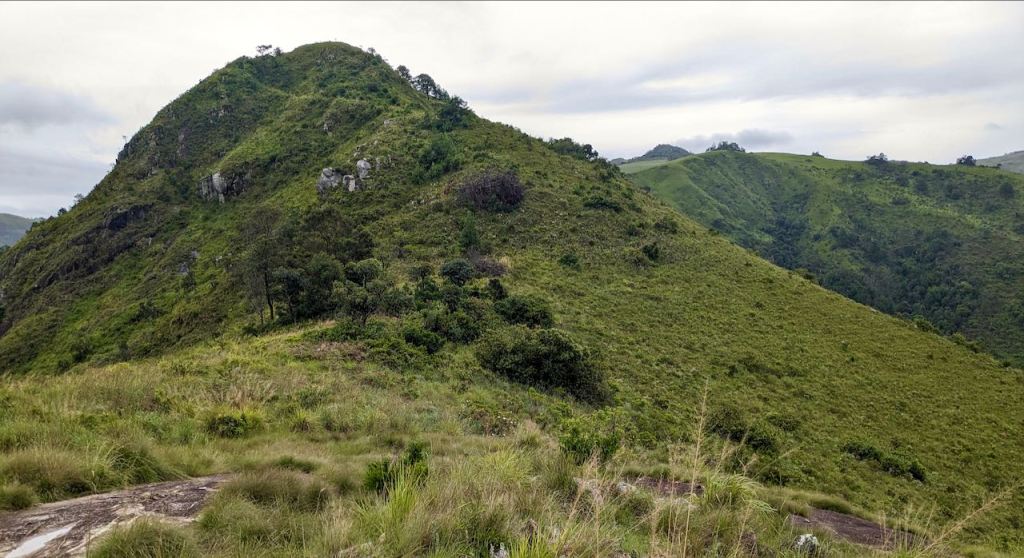
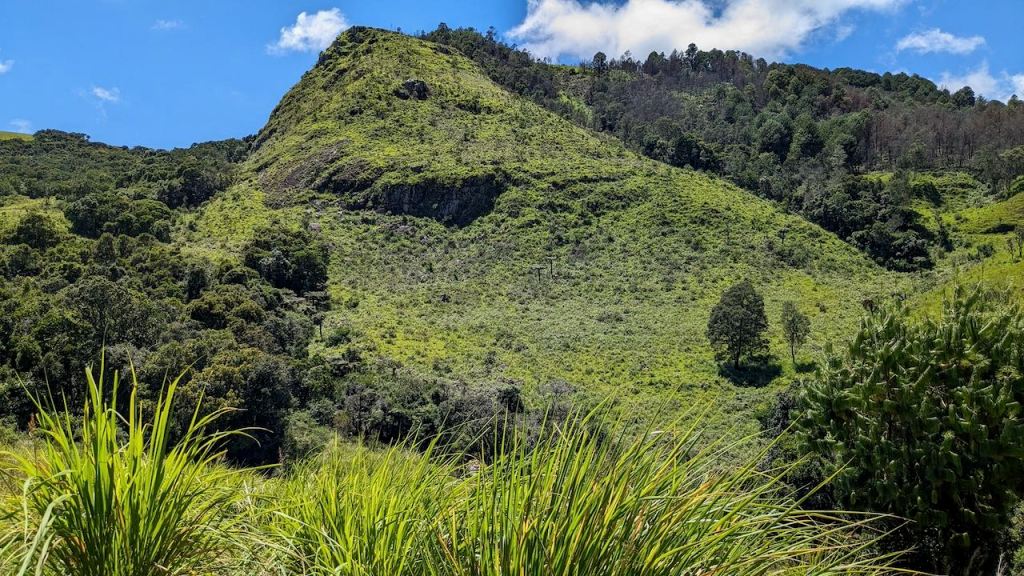
This hill is called Mumunzi on the 1972 era maps and has been solidly standing there, side by side with the now familiar Menzi ridge to the north west, just looking a lot more ominous and out of reach. Now with the advent of camping man in January 2024 I had to give it a go: starting by looking for paths on Google Maps satellite and hoping they had not grown over in the intervening year(s); as well as scouting at a distance for any possible tracks whilst on other hikes. Asking for advice and hoping its not an obligatory ‘yes’ but an actual path is an option in some other places.
View from Mumunzi eastern spur, across to Menzi ridge, to Kwaraguza behind. Chirwe river below. Mufenje tree.
First, a mandatory, hard won, health and safety lecture on TRACKS.
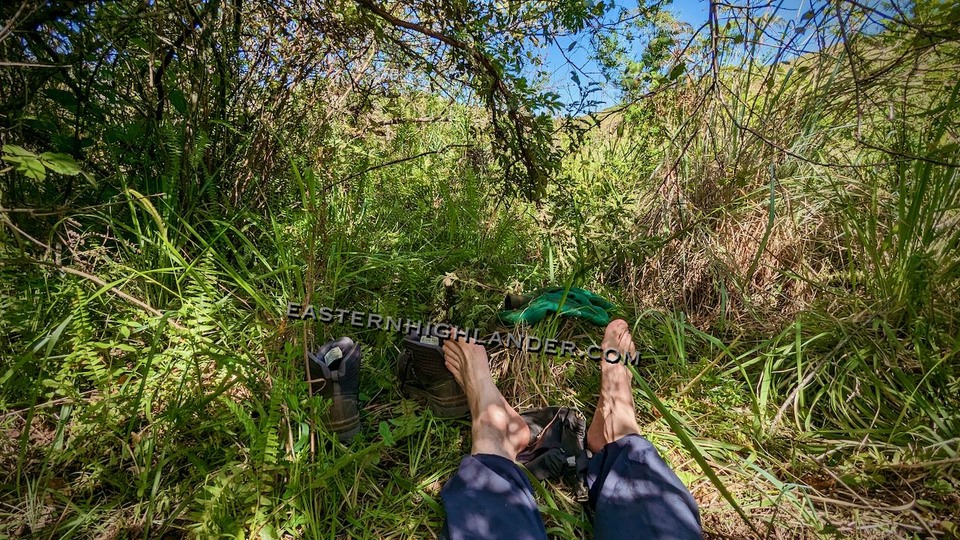
Some tracks are from animals: cows are good; baboon the worst as they are strong enough to simply go ‘straight up / down’ with no zig zagging, but even they are better than nothing when it comes to pushing through the long grass. Best of course are the tracks left behind by the pine loggers – they will go practically anywhere to get their hands on a straight pine tree – however their tracks don’t last forever and only go as far as the last pine tree. SO, a new trip is always a case of mix and match and hoping for the best. When this breaks down because the hoped for, longed for, out of date satellite image path down no longer exists then bushwhacking, without a whacker, is your thing. IE pushing through the undergrowth of 1m long grass growing in tall, trip-able, tufts or through some other scrub like stuff on the side of a hill – it’s all just high enough to really get in your way and mask the stones and animal holes at ground level. And the prickly jobs going through your clothes – they receive a free whack from the walking pole though, making the path better for someone next time.
The wonderful long grass – going up Mumunzi. Menzi ridge in the middle distance.
When it’s bad this is really mind numbing and body sapping and a kilometre could take an hour – and naturally its rather warm – and the sun is cooking your head off – and the water is running out – and you wish you hadn’t started etc etc. On this trip I crawled half into an eroded ‘cave’ in a dried up stream to scavenge a four litre refill. (I was coming off Mumunzi with no water re-fill since the day before.) It should not have been at all dry but the rainy season has been ‘gone’ for a month. There was a small freshwater crab but nothing else scary! (The lack of rain for so long means the non-irrigated crops will have failed in the country – scary for 3 – 4 million people.)
Oh, and crossing even the smallest stream can be an impossibility in some places because the water enables umpteen different and dense plants, shrubs and trees to grow all together, at the same time, in the same place, for a couple of metres either side, or much more if it’s flat and marshy in the bottom of a valley. In these cases the baboons / animals get their drinks in by going under the wretched bush and you are stuck, looking for reverse gear, facing a bothersome retreat back up the hill with hope fading and pinpricks of worry edging out the feel-good day you thought you were having.
Steep way off Mumunzi east.
I haven’t even mentioned the gradient; of course it all looks do-able at home; not steep at all on the satellite image, but when you get there – different story – either exhausting or scarily steep!
Summary: finding a good path is a joyous thing; even walking two sides of a triangle is OK because; bushwhacking can really mess up your day. Lesson ends, but don’t forget it. Bloody out-of-date satellite images and those who believe them!!!
Back to the tale:
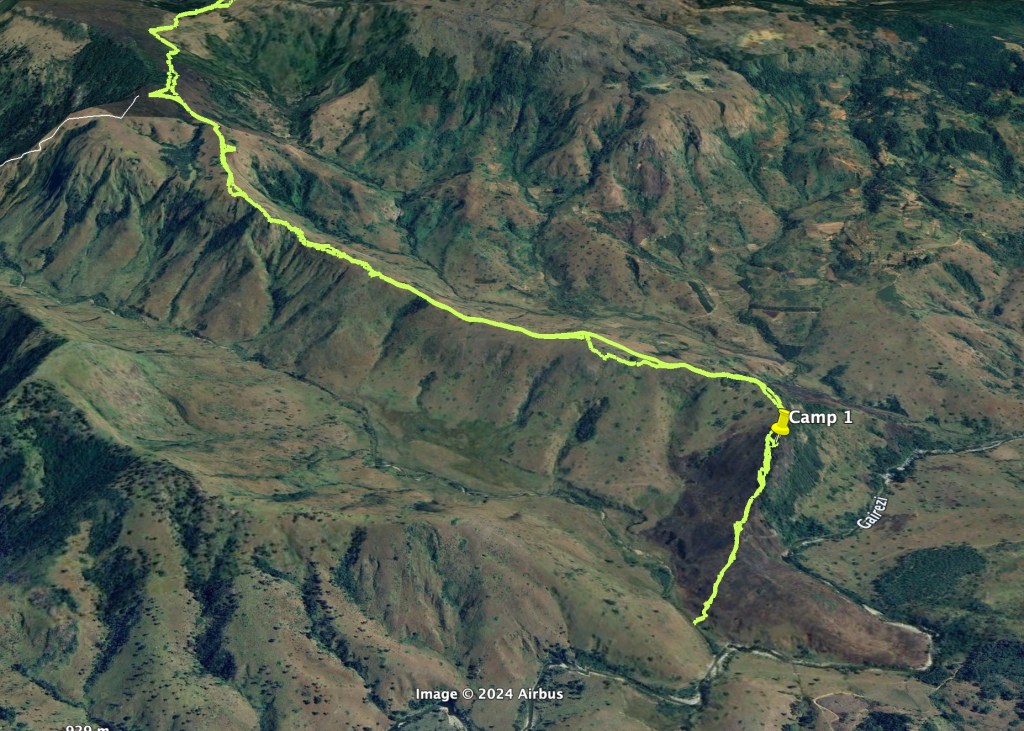
Enforced two hour food rest Gairezi. This was supposed to be my stop for the night!
I had planned a very doable 15km walk-in and camp so I would be fresh for the new terrain the next day, however after a two hour rest to cook and eat, and with about three hours of day-light left I had to give it a go and set off for Mumunzi, or as far up as I could get.
Terrific pictures on the way up as the sun was lowering itself in the sky just pushed me on and on.
More or less of a path heading up through the long tufted stuff.
The sun was going down, I was still going up, the rounded ridge becoming a bit narrower – potential spur off the south side, then just before the top I hit the steep, large boulders mixed with tall grass section which continued on top, narrow, though levelling out.
Dusk’s shadow across the way I had just walked up
By this time I had long, long passed any remotely possible camping areas. I did not fancy trying to make my way down hill through the giant boulder and grass set up, with tired legs and a rucksack. The light was deceasing as the sun was now behind the Kwaraguza 2200m plateau and consequently the ‘autonomic adventure mode,’ ie adrenalin, kicked in keeping me in 4WD and moving ever onwards. I could not see what was on the south side of the ridge but trees were disappearing downwards through the boulders. I had thoughts of wrapping myself in the tent for the night.
Moonrise on Mumunzi
Round the corner the terrain eased removing the boulders but leaving the very long grass as some kind of an improvement for me – and at least it was level-ish. Pushing on looking for any sort of path I went closer to the trees and undergrowth to find that they were good at keeping out the tufted grass! I was able to work a space wide enough and high enough to squeeze the tent into – tying the guys to various branches and logs.
Morning on Mumunzi – looking over the Menzi ridge to the Kwaraguza plateau (not the one on google maps).My way in / out of the camp next morning – left of the rucksack.A tent sized hole under the trees
Of course the next day I found quite a few potential campsites on along the ridge but this one was mine.
The walk along the ridge was so exciting because of the new perspectives and views. I could now see the whole of the Menzi ridge from the south side.
Pano – Menzi ridge from Mumunzi
The Mount Nyangani escarpment was ahead of me as well as the Gairezi river to my left and much higher up the Gairezi falls in the far distance, and Little Nyangani, and the plains below.
Nyangani from MumunziLittle Nyangani (left) and the Gairezi river – just a sliver of the Gairezi falls showingChirwe river valley from Mumunzi – Menzi ridge to left. Joining the Gairezi river running right to left, then onwards under that escarpment in the distance – already visited – if you recall!Looking east on Mumunzi
I pushed onwards with darts from side to side to check the views, with the vain hope of an unknown, well nigh impossible path down the western end.
Looking down from the impassable western end of Mumunzi
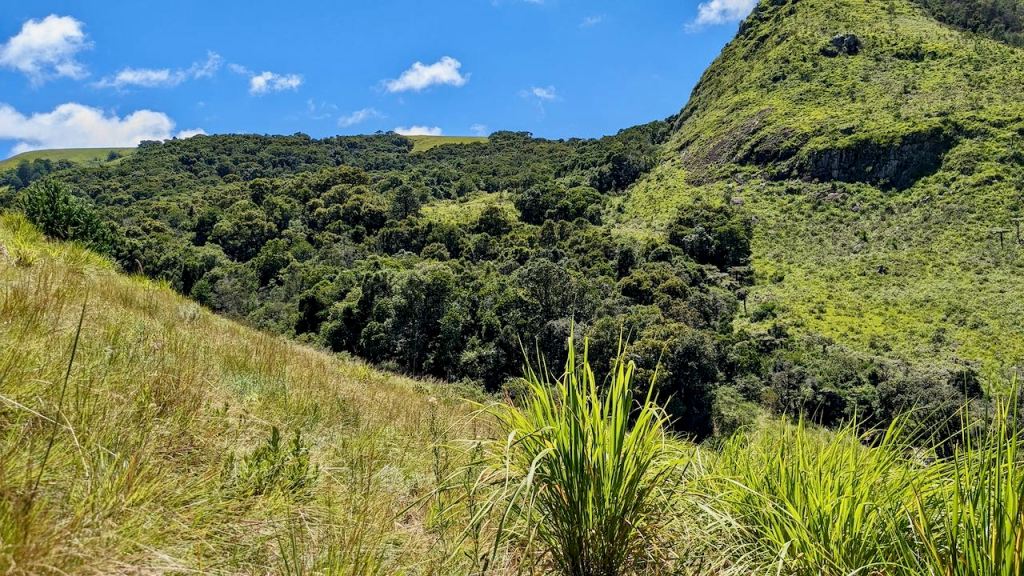
Westen end Mumunzi from below. I came down where the brighter sunlight is to the right of the ridge. Rainforest behind.
Rain forest – south face Mumunzi
The loggers had of course been around on Mumunzi and left me a steep path, down a steep spur.
My way down
I didn’t want to follow it all the way to the vehicle track in the distance and cut off west according to the way I had marked from the satellite image on Google. This was the beginning of a cruel couple of hours, cross country, cross stream, up hill, low water, no path, hump through the sango / bush. See lecture at top for the general idea.
I’m probably not the only one hacked off. Probably a loggers truck.
Eventually I gave up and used the vehicle track to climb the hill, then overshot my exit and had to walk back through a different, easier, kind of long grass at the top of the hill. There was a strange wall, wide enough to walk on in places, about a meter wide and high, for quite a distance, mainly overgrown now. I was heading right back at Mumunzi – toward the impossible end of the ridge.
Previously, and on the way in on the Menzi ridge, I had spied a freshly made route / flattened grass that looked like it would take me down to the Chirwe river at the bottom and, I trusted, a doable path along the river valley back towards the Gairezi.
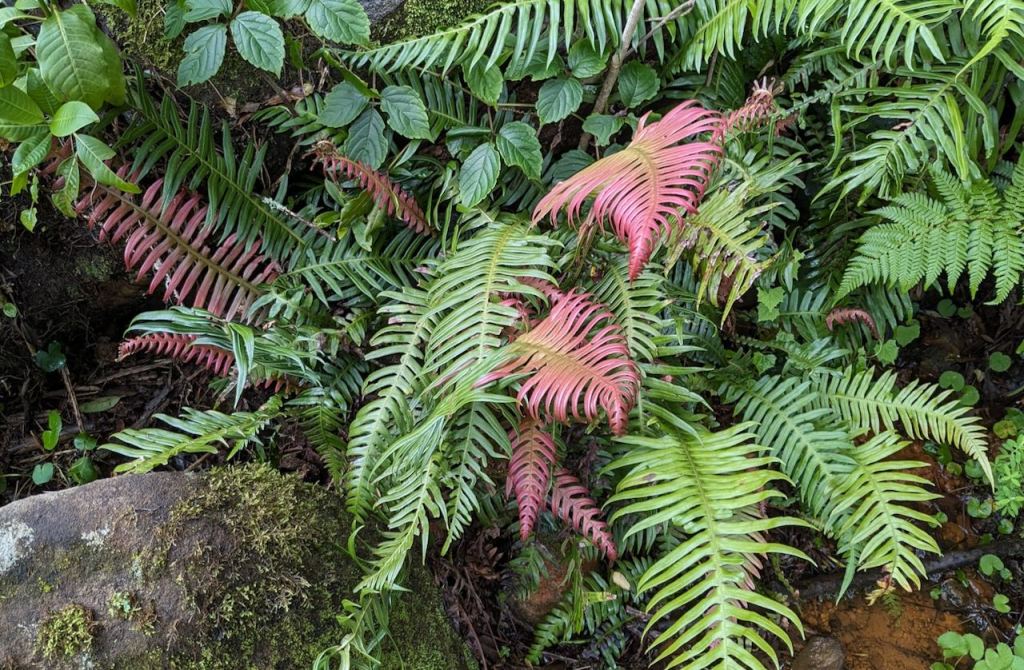
Can you see the old path of the river? There is probably more than one.Before the slope up, on the left, there is a line of tree ferns marking the old course of the Chirwe. Geo lesson over.
In trying to work out what made the flattened grass I’m guessing it was cows being herded along but I haven’t seen the like before – as it they were towing a barrel on their way, flattening the grass. (This was certainly true half way along the valley floor as some small scale logging had been recently taking place and presumably some of it had already been carried out by mombe / cow.)
Quite far down the Chirwe looking back up at Mumunzi
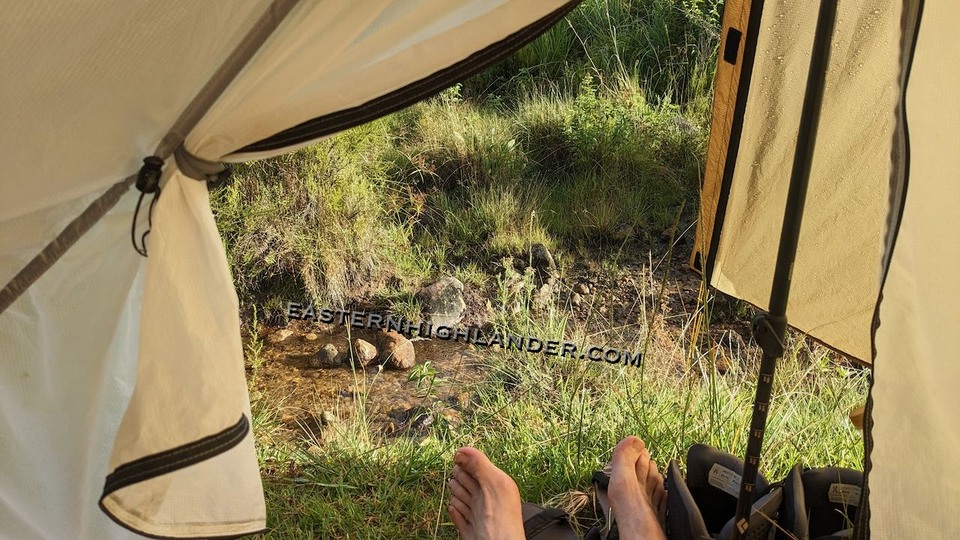
I stopped for my enforced two hour cook-up under a friendly pine tree (too ‘branchy’ to be useful for the loggers) then made it to a new camp site on some square meters of grass by the stream.
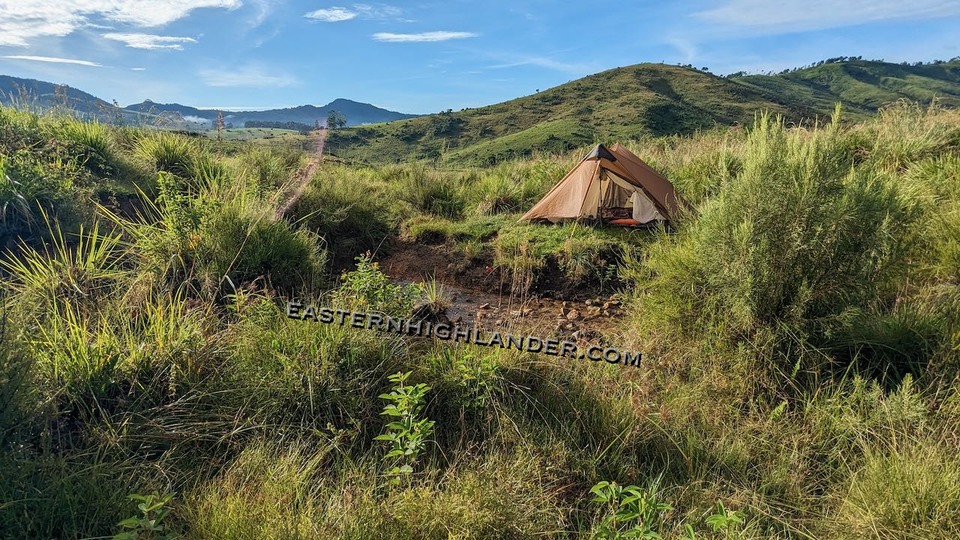
You see what happens to that grass when it gets out of hand; just look at the size of it compared to my tent!Errant cloud the next morning.
Didn’t see the ant hole in the ground till it was too late so swapped my entrance side to the balcony overlooking the water.
Next day was a long slog out back up the Menzi ridge, with an hour under a pine tree sheltering in / under my poncho. No lightning so I judged it was OK!
View down to the Gairezi from Menzi ridge spurSome sort of flying insect jobbies, appeared after the rain.
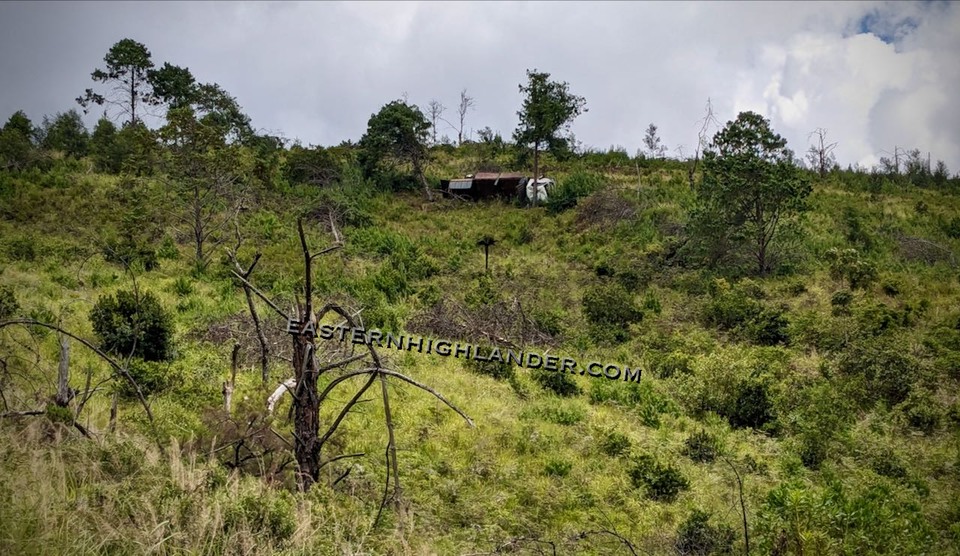
BTW there are / were some other visitors in the area – ashes still warm:
A shake-down, warm-up, first camp out in the tent. I had hoped to use the Menzi ridge as a way to get down to, and cross, the Chirwe river in preparation for Mumunzi, however it was (of course!) the rainy season, and so, at the tired end of the day I decided not to risk the crossing on my own + Jack Russell carry.
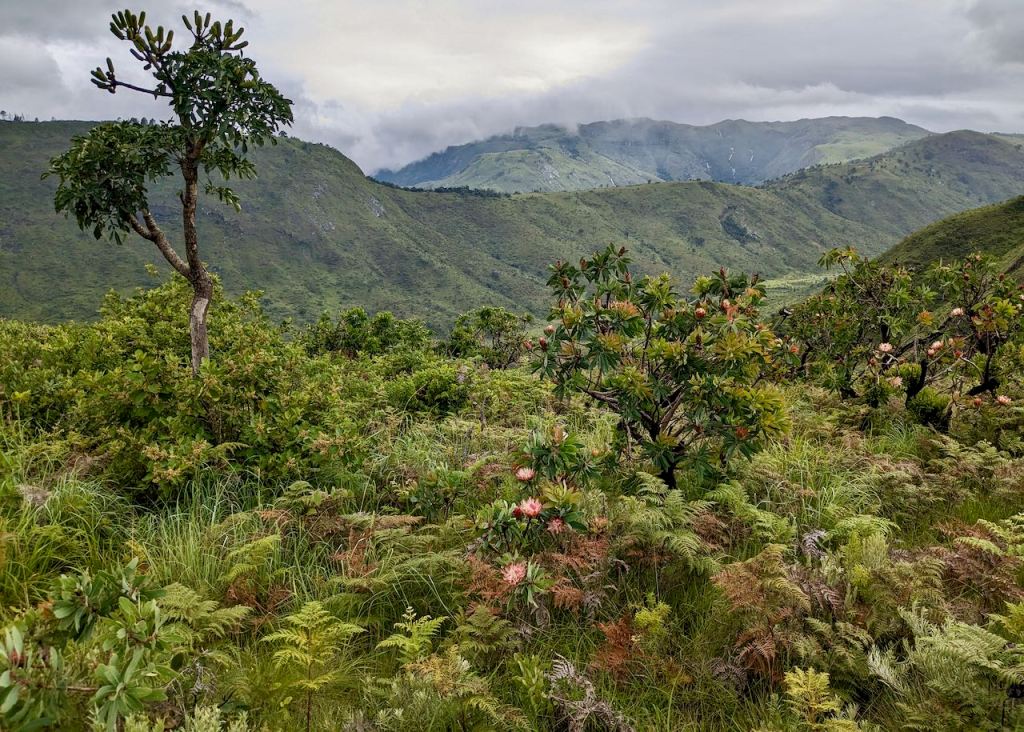
Light green arrows. 1973. 1 inch = 1 mile. 1 to 63 360.The view across to Mumunzi from the way down the ‘steep bit’ on the Menzi ridgeThe ‘steep bit’ on the Menzi ridge. At the top, path visible top left diagonally to right.Under one of the pine trees on the way down that sectionFrom the Protea munda at the bottom of the section, across the Chirwe valley and up to Mount Nyangani – you can just make out the waterfalls cascading off the top plateau.‘Alpine’ cows on the lower part of the ridgeMonet not looking at the rest of the now-flattened-out ridge
After some plodding we passed the end of the ridge, which ends in a forest and cliff, instead turning ‘right’ southwards to carry on down the spur.
The Gairezi from Menzi ridge south spur
Below is the Chirwe, flowing too fast for me to want to cross with the dog in one arm at the end of the day – she agreed.
So we refilled with water and trudged halfway back up the spur to a relatively flat, fewest tufts, least contorted, camp site and pitched just as it was about switch out the lights.
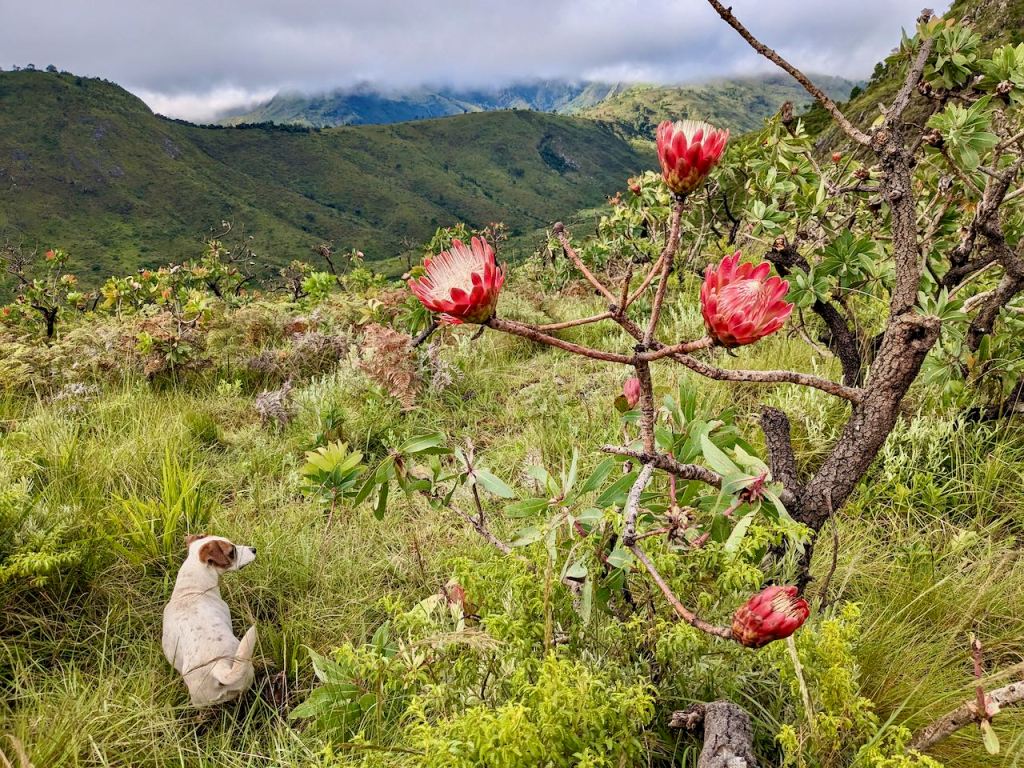
NEXT MORNING: Weather no better!
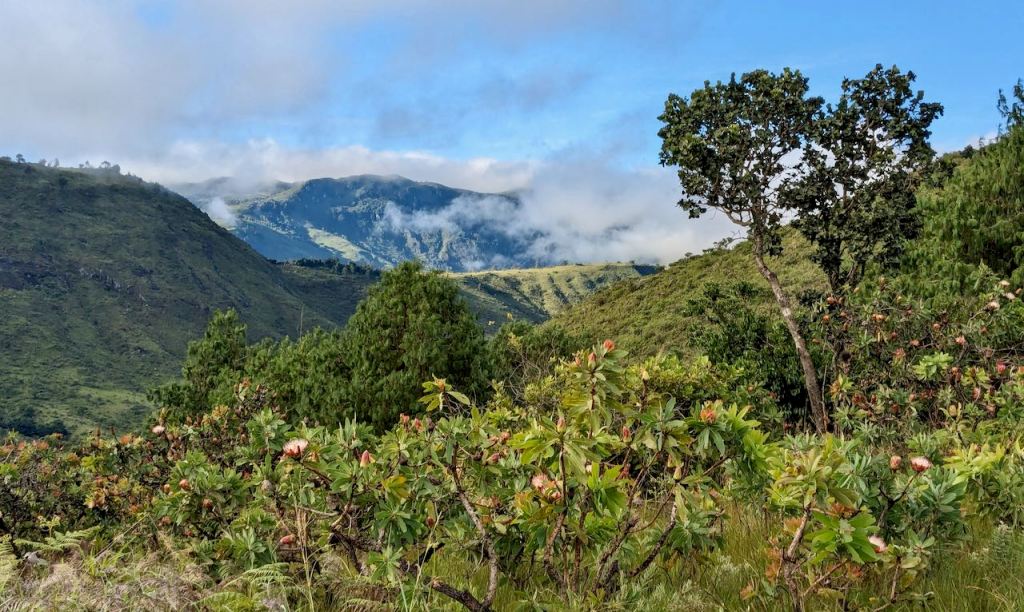
These tufts are a problem!A hint of blue sky as we take a slight detour north off the main ridge avoiding the tall wet grassBack at the Proteas – take your pick!
The steep section was easier on the way up
and with a break in the clouds produced a photographer’s landscape over the Chirwe:
Chirwe up to Nyangani in the clouds
Much higher up and we were back in the short stretch of sub-tropical forest
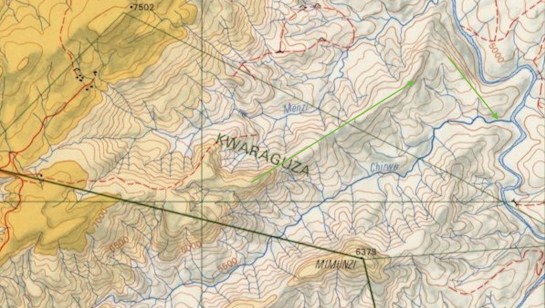
Menzi ridge and spur1973. 1 inch = 1 mile. 1 to 63 360. (Google has Kwaraguza in completely the wrong location in Maps)
For my intended through-hike to Aberfoyle there have always been two looming obstacles:
a) how to get up out of the Gairezi river valley and up to the plateau, in the direction I wish to travel (ie without taking a circuitous route via Nyafaru or the National Park road);
and
b) how to descend about 800m from the plateau to Honde. The first was solved during this three day hike, and the second is now better informed after meeting a Mr Kasu at the pass – as he had walked up from the Honde side for a funeral - and he basically confirmed the route shown on the 1972 maps.
Back to the here and now:
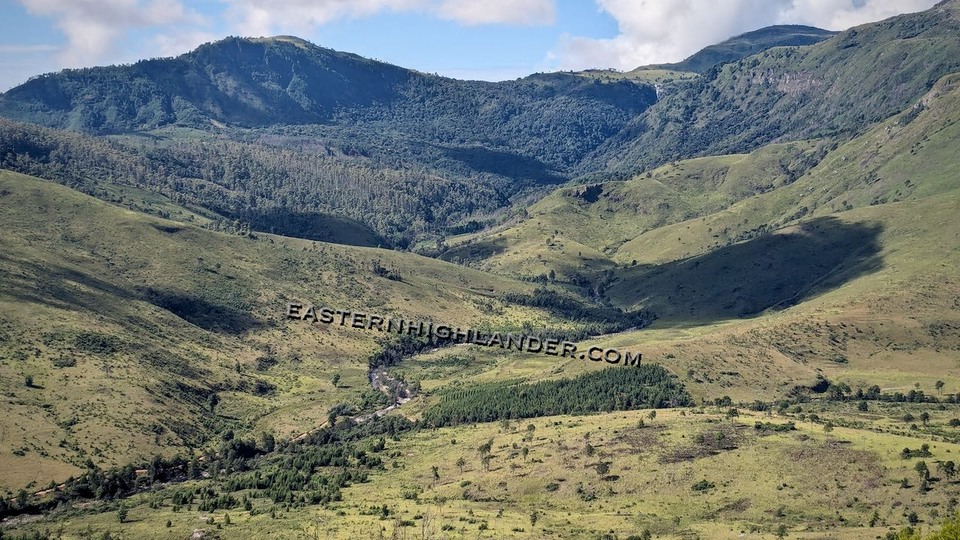
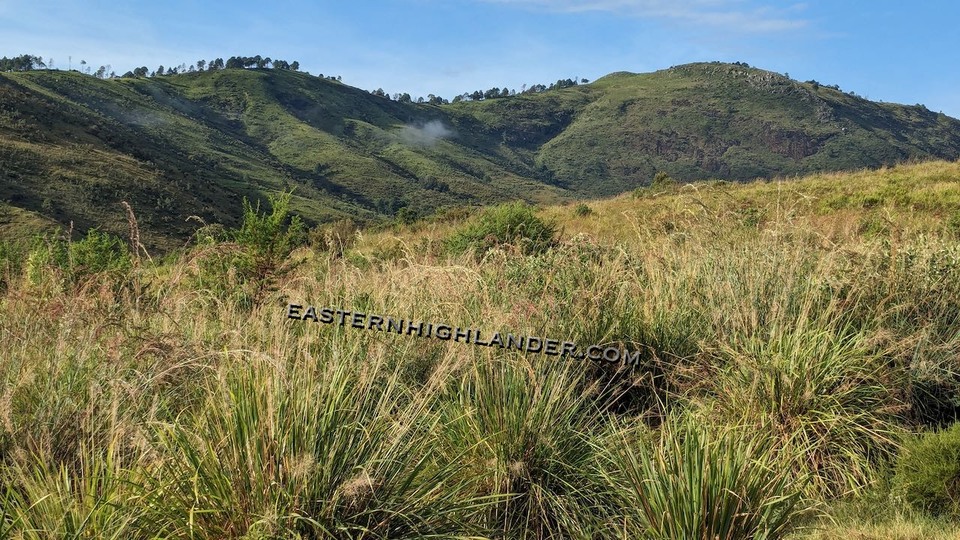
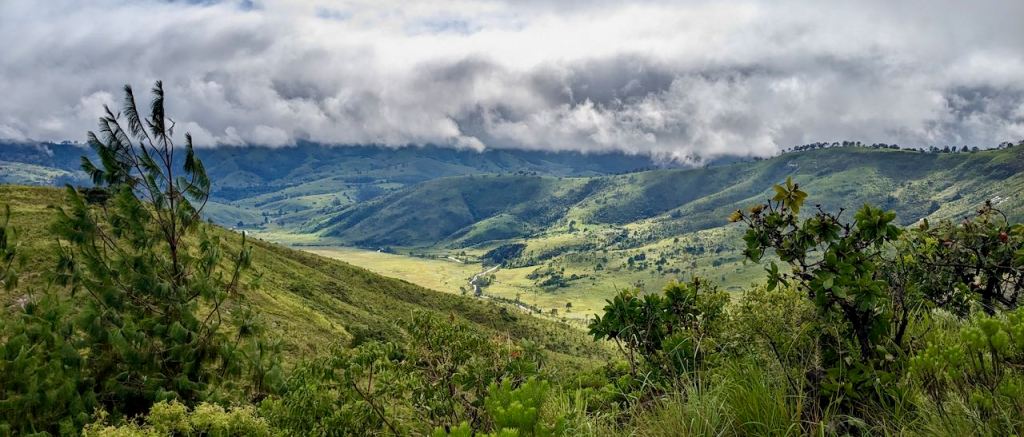
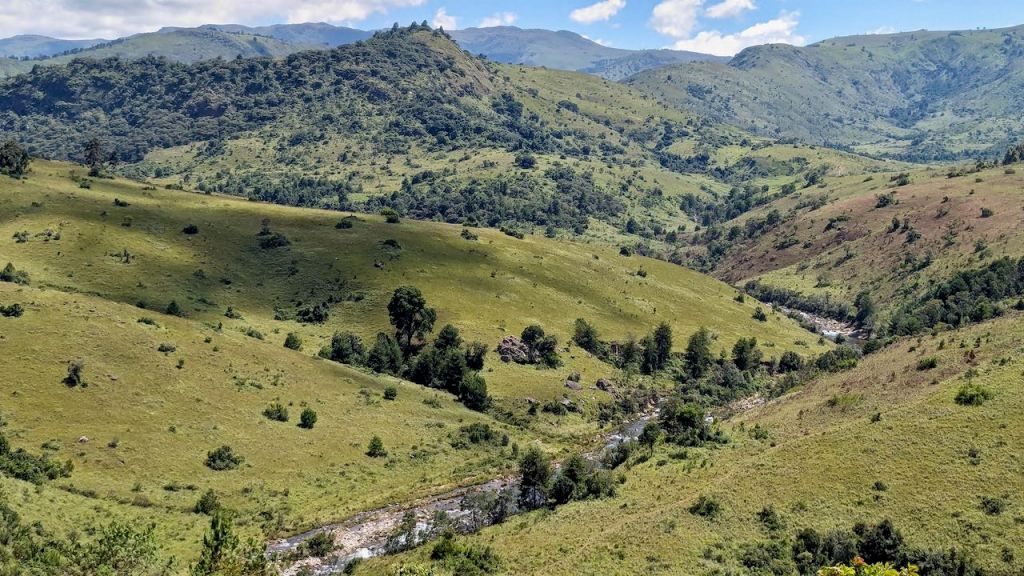
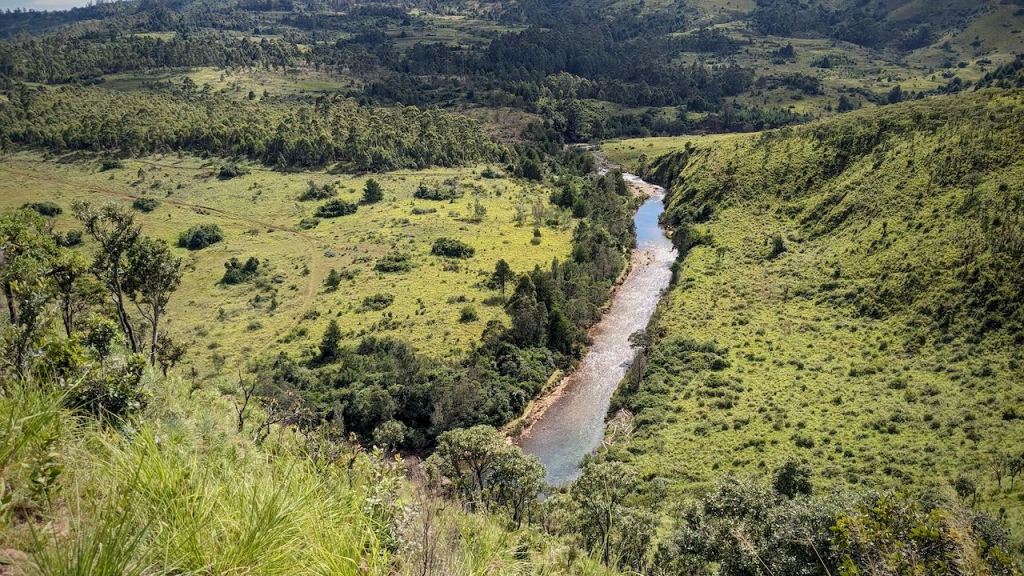
I wanted to avoid a river crossing during the rainy season and try walking in via Dazi and the bridge. Anyway, what you have to realise is that the valleys were not formed via glaciation – and this makes all the difference! A glacier-formed valley is more smooth sided and has a ‘more predictable’ valley floor. Our valleys are specially made to include interlocking spurs in a completely different erosion pattern. Being in the bottom of a valley means nothing as there may be a narrow cut channel for the river as it winds itself between ‘giant’ spurs which have to be climbed even though you are in the bottom of the valley. This is absolutely true of the large Gairezi valley in this area and the small Menzi valley, though not the smaller Chirwe. I’ll have to show you what I mean. Below, one of my typically picturesque views of the Gairezi valley – however the flat valley bottom is lacking.
Gairezi valley – position above and west of Dazi
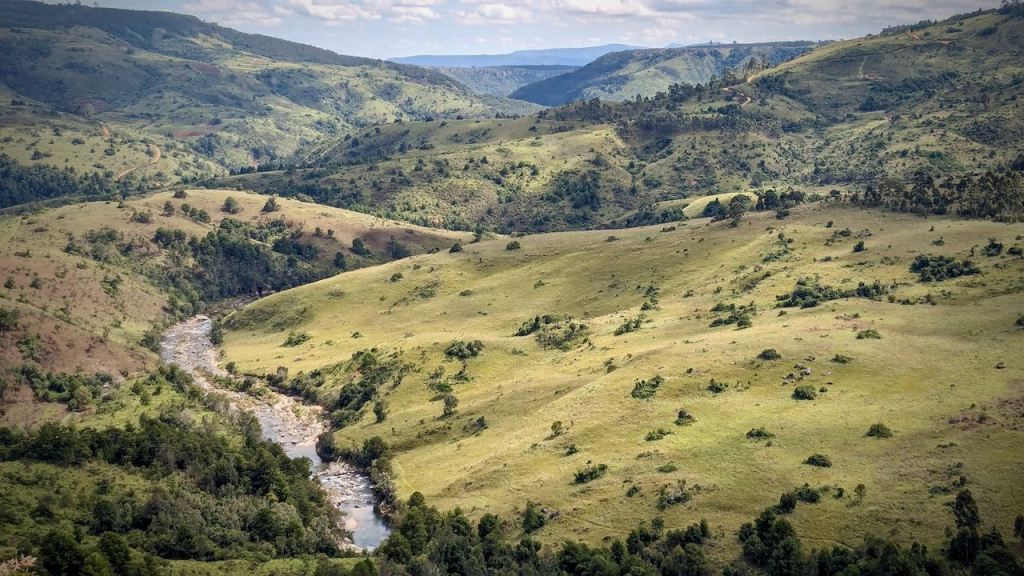
Examples of the Gairezi river and valley bottom:
Gairezi river – not so far from the Dazi bridgeGairezi river – higher upGairezi river just after the Menzi valley. Menzi ridge (or giant spur) running top right to top left .
These spurs and mounds make the landscape look ‘simply wonderful’ – just a lot more challenging for route planning and walking ‘through’ a valley.
For the above mentioned reason the walking in ‘to’ and waking away ‘from’ Dazi bridge was a major heartache of effort, frustration, and heat, and I was relieved to make my first campsite, at least in a higher area than I had been in before.
Next morning saw more plodding over spurs until the first sighting of what I hoped would be my pass!
From the centre about half way up – in line with the tree in the foreground – hopefully the pass!
More spurs and mini-valleys later
Closer!
And even a ‘flood plain’ / old meander site higher up:
Hiking up much closer to the pass I detoured (climbed up a spur!) to a small homestead and hopefully some route advice.
Hill on the north side of the passHill on the south side of the pass
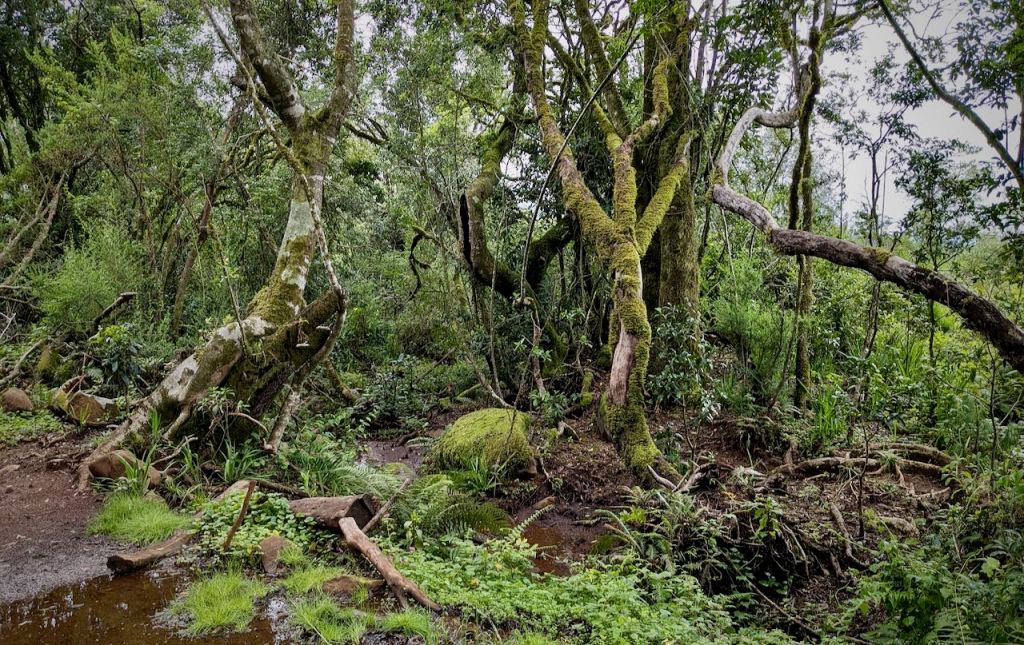
His good advice sent me steeply back down to cross a stream and catch the path up through the rainforest.
So something like “back down into this valley, cross the stream, then up through the forest to the clearing and continue through the forest to the right”.Stream below passTree ferns at the passI haven’t seen the long thin jobs before!Fern spores underside of leaf
Videos of trees and monkey alarm calls on FB. Taken during a very needed, cool, shaded, refreshment break – second day exhaustion!
Top of the rain forest inhabiting the start of a water course
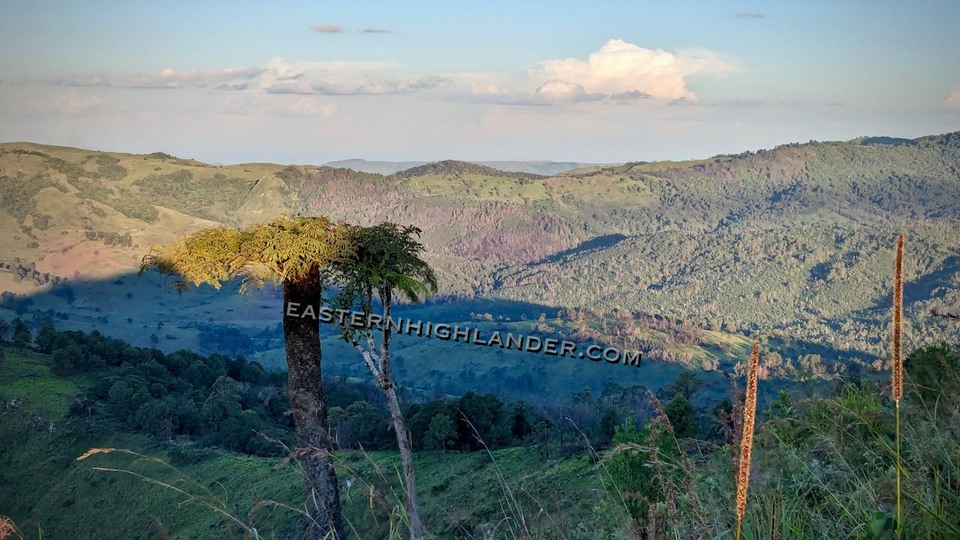
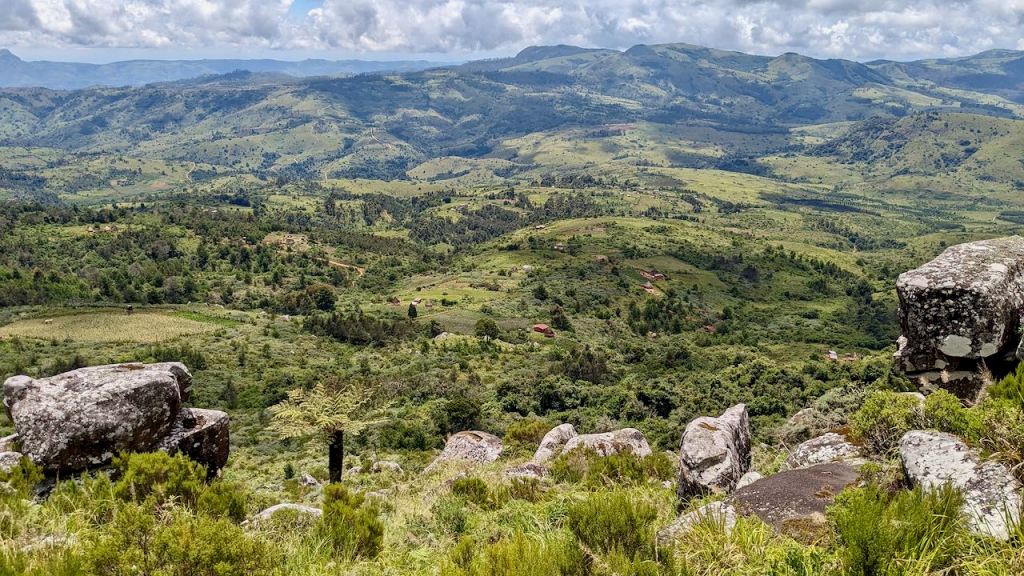
My first real view down the ‘other side’, and yes it’s barely a plateau as it is full of spurs and mounds. Anyhoo, it’s a much higher region than the land to the south, in the distance
These pics taken at about 1800m
And the views are stunning!
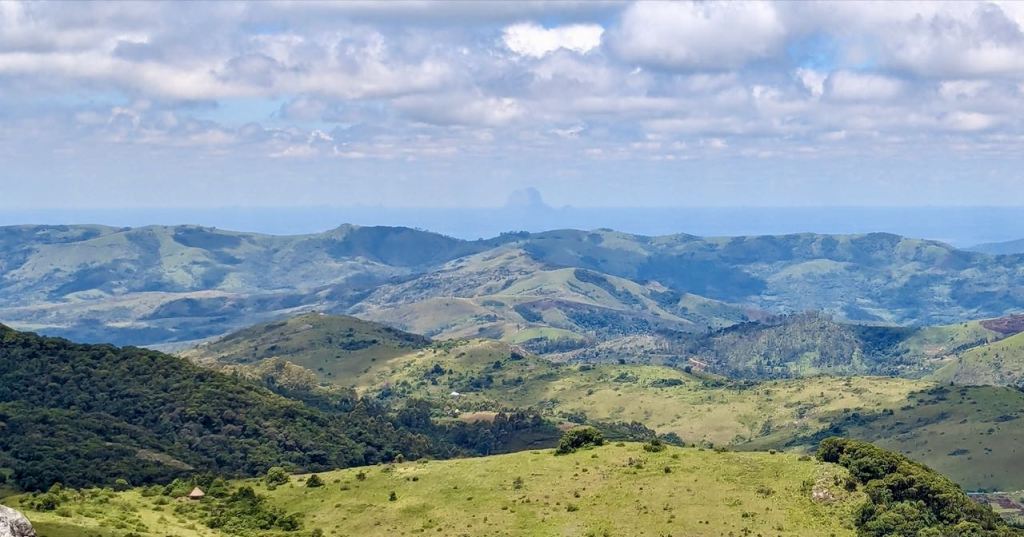
From hill after the pass. Honde is so far below and close in we cannot see it – 800m below the edge along the mid line. Most of the distance is Mozambique – left of centre line.
And let’s not miss this guy in the distance in Mozambique!
To Mozambique
Looking back, south west, to Mount Nyangani in the clouds:
Plateau SW to Mount Nyangani
Now having almost retraced back into the Gairezi valley
Much lower down, back at the Gairezi valley againOut in the long grass
From the Menzi ridge – view to the pass = ridge line and the small peak to the left of centre is the steep looking hill to the south of the pass in earlier pictures.
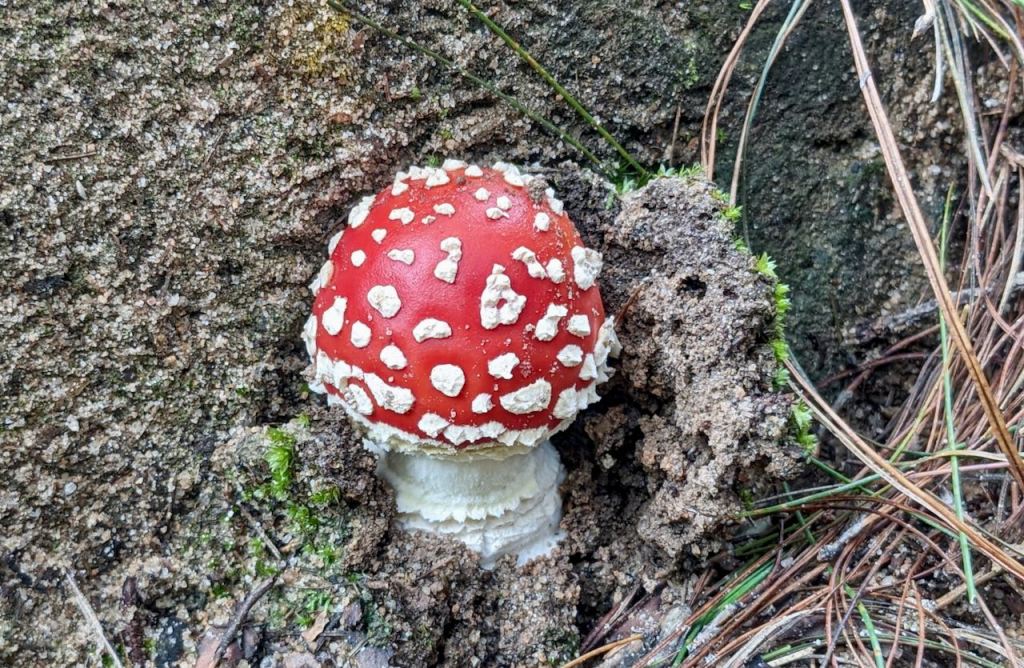
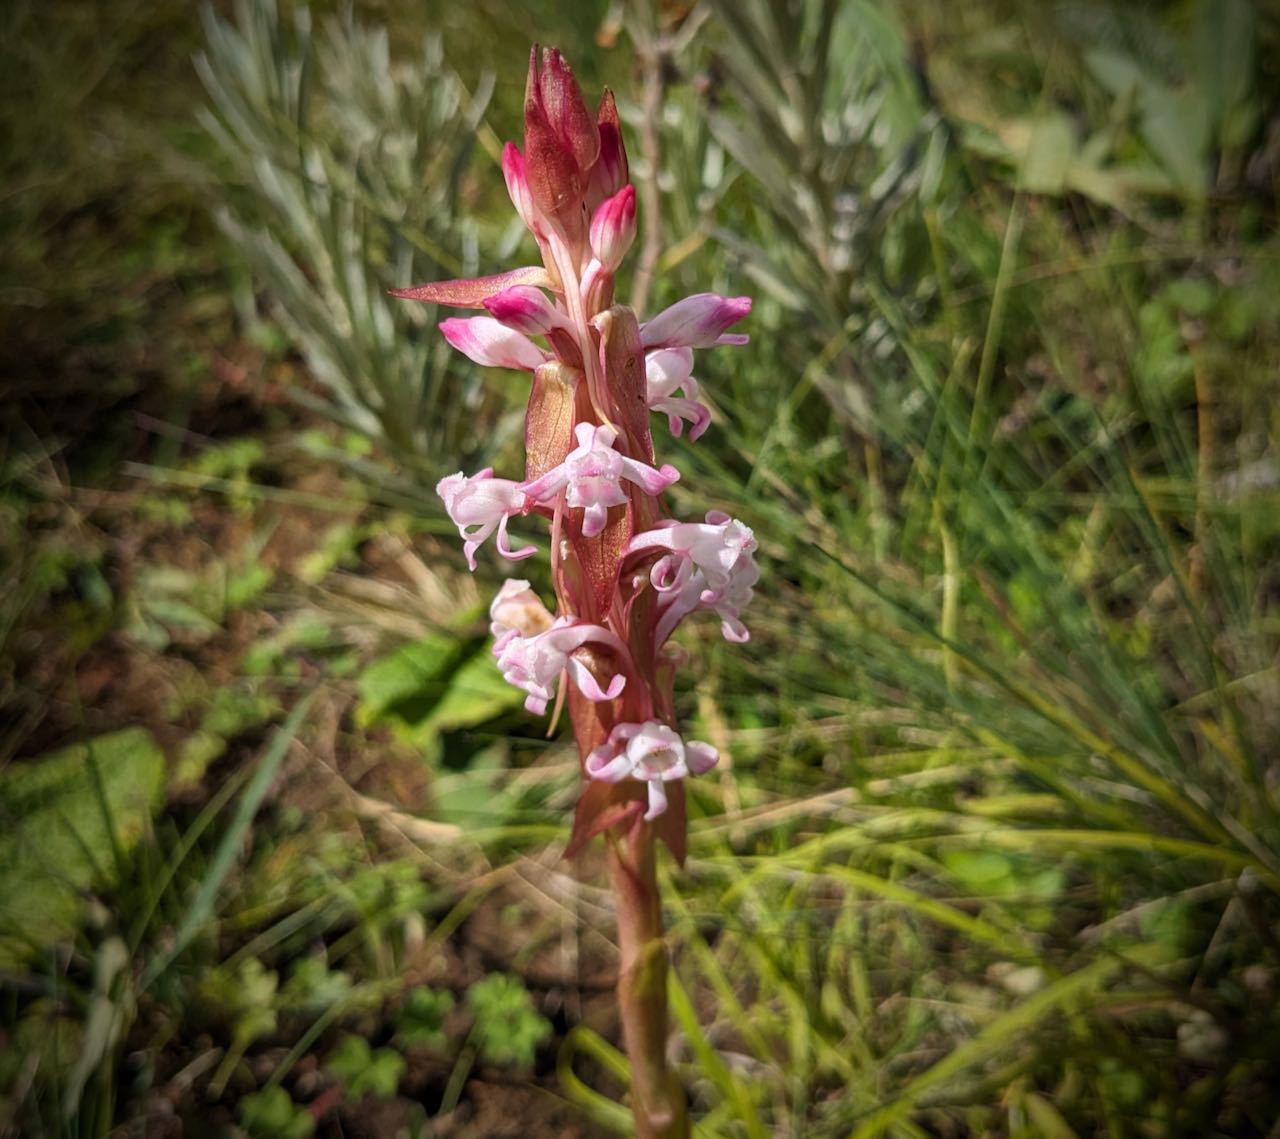
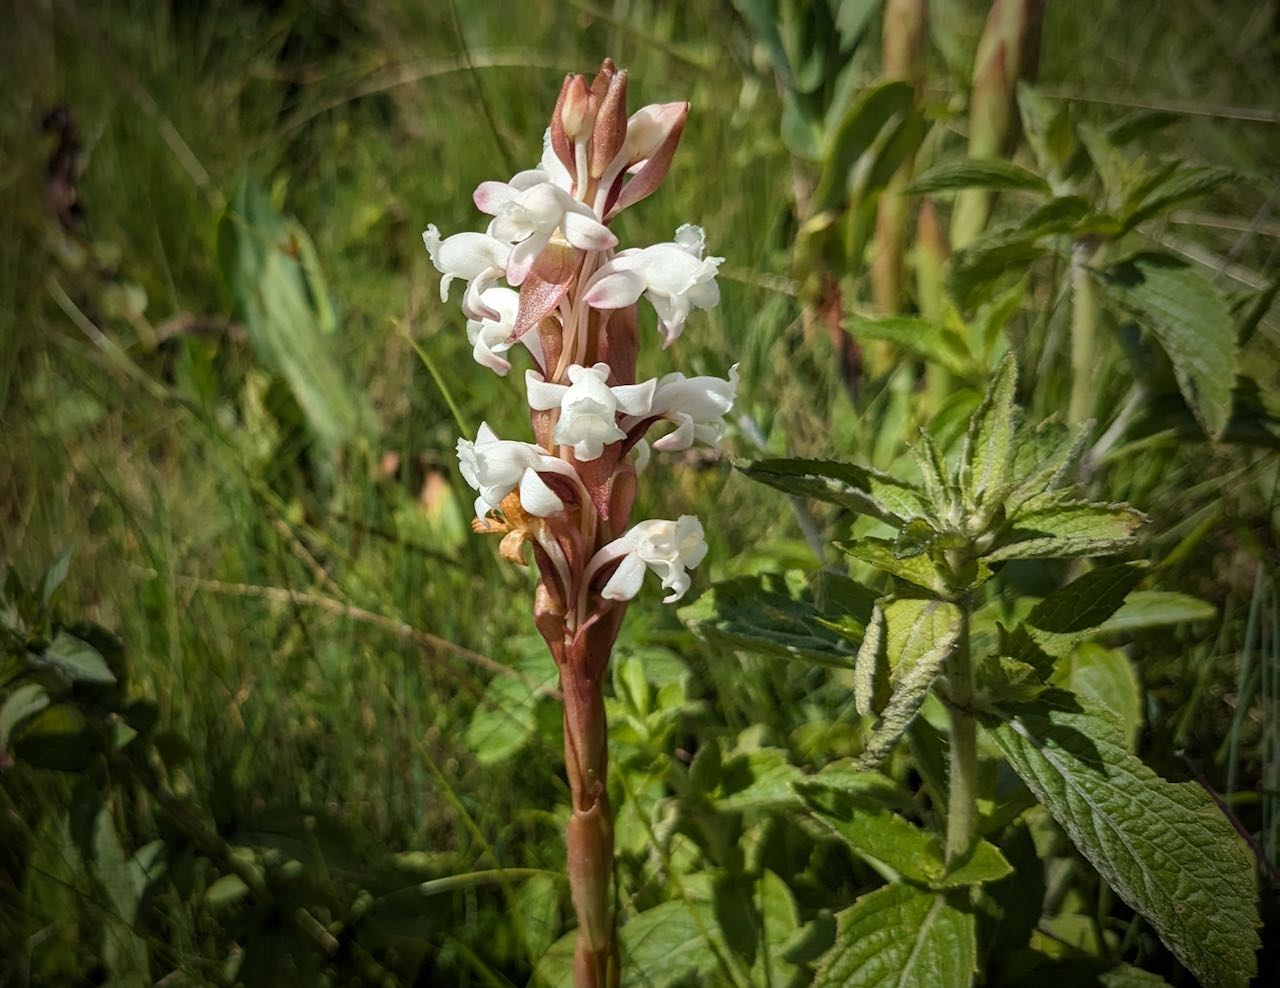
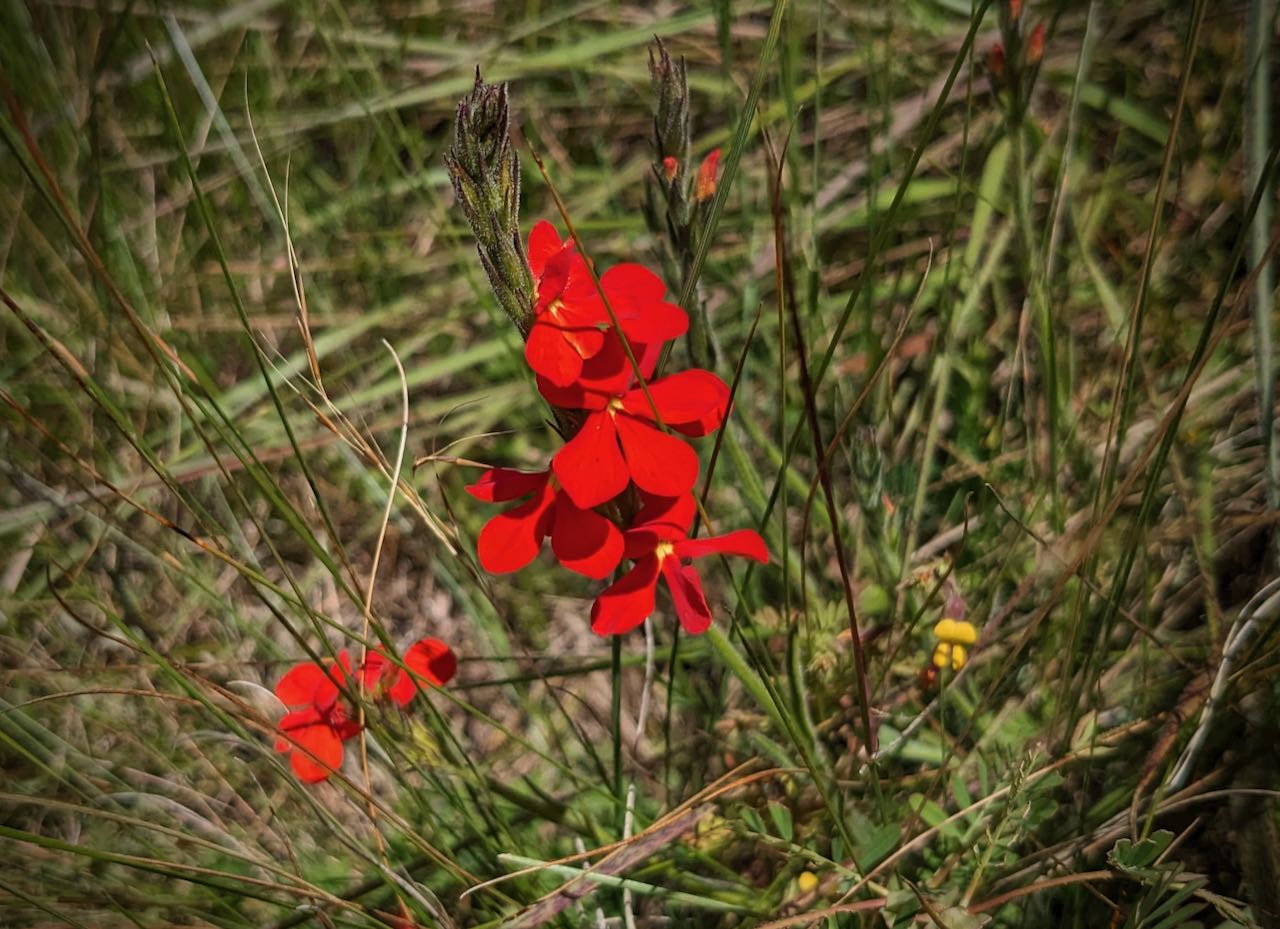
Finally a bit of the wildlife: the two orchids – satyrium longicauda; red job – ?; guttural toad; juvenile homo sapiens.
Lesson learnt. Going back to my ‘rambling’ at the start about spurs and river valleys: the best route in would have been the one I took on my way out – i.e. to walk along and down the Menzi ridge which is a shorter distance with a single ridge route to reach the Gairezi river — which then needs to be crossed – something to contend with in the rainy season!